This post is part of the Home network v2 series.
After my Wi-Fi mapping adventure — I found a few spots with low Wi-Fi signal. Both kids’ rooms on the 2nd floor only had mediocre signal, at -67 and -68 dBm 2.4 GHz, and the side garden had -71 dBm — which is terrible!
I also discovered that Mona’s side of the bed had much worse Wi-Fi signal than my side. This was because I had a clear line of sight to the UAP-AC-IW in the den, but the signal to Mona’s side had to go through a wall and her wardrobe…
Simply not acceptable, something had to be done!
Table of contents
Replaced AP in office with U6-Lite
I replaced UAP-AC-Lite in my home office with a U6-Lite — they use the same mounting hardware so it’s very easy to swap. I wanted to try the U6 series, but I don’t have a single Wi-Fi 6 capable device — so… 🤷
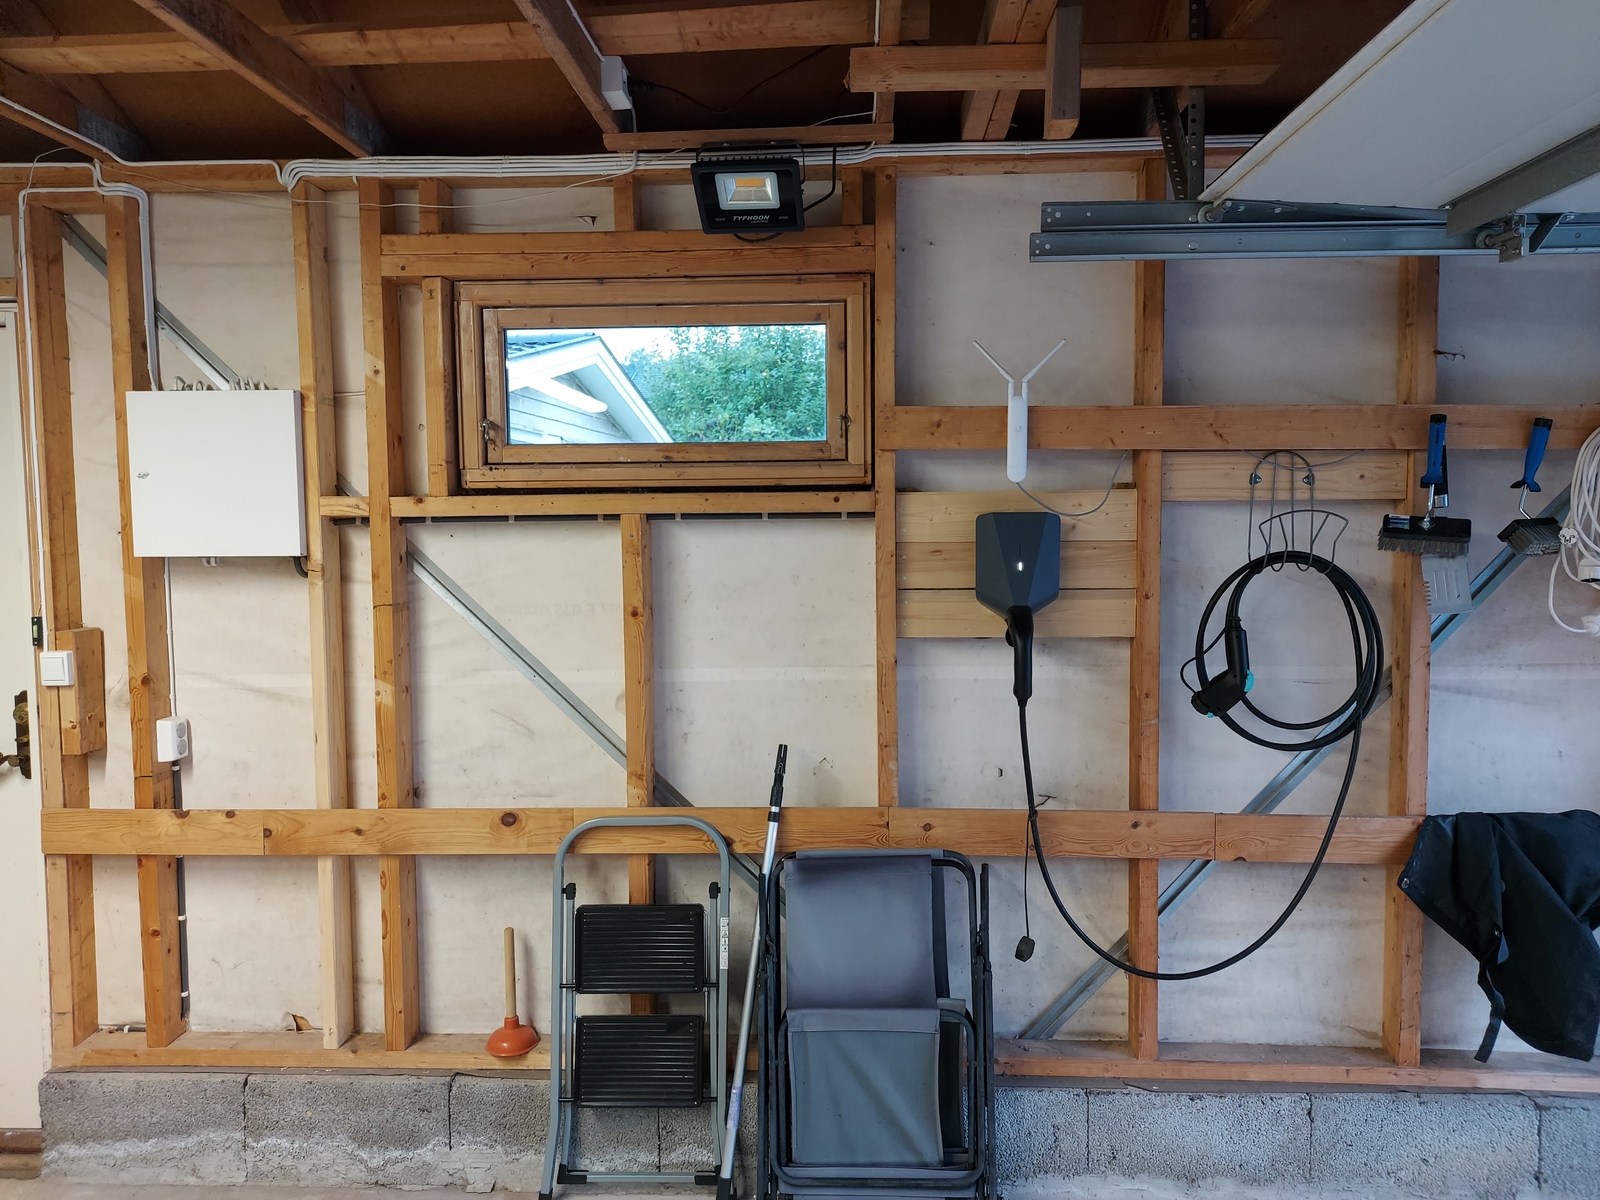
Moved AP in garage
One thing that puzzled me was the terrible signal in the side garden — it has a clear line of sight to the garage, and it’s not that far. Why didn’t the signal from the UAP-AC-M in the garage reach further?
Well — the answer, once I figured it out, was quite obvious. The access point was mounted directly in line with the gutter outside, which is made of steel. And steel is pretty good at damping Wi-Fi signals.
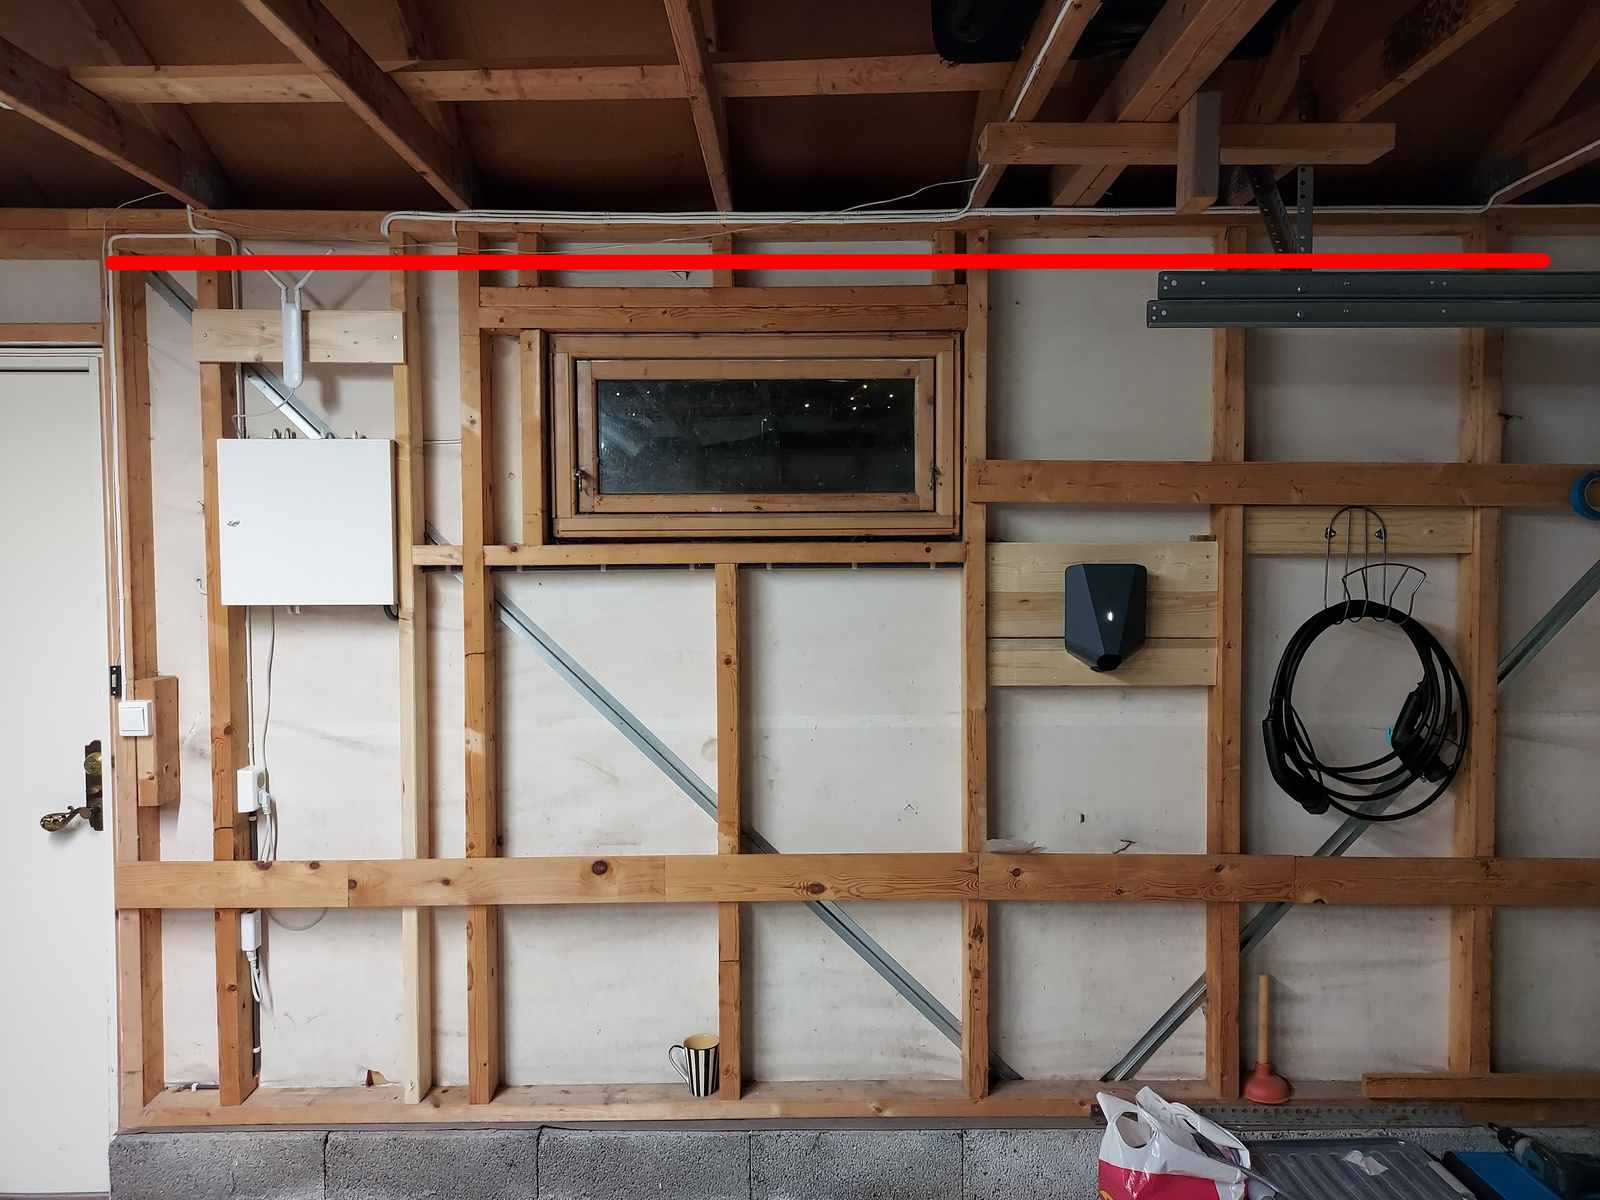
I tried moving it to the right side, and lower it slightly. That improved the signal outside, but then the rails for the garage door got in the way — and caused the signal to get worse inside the garage.
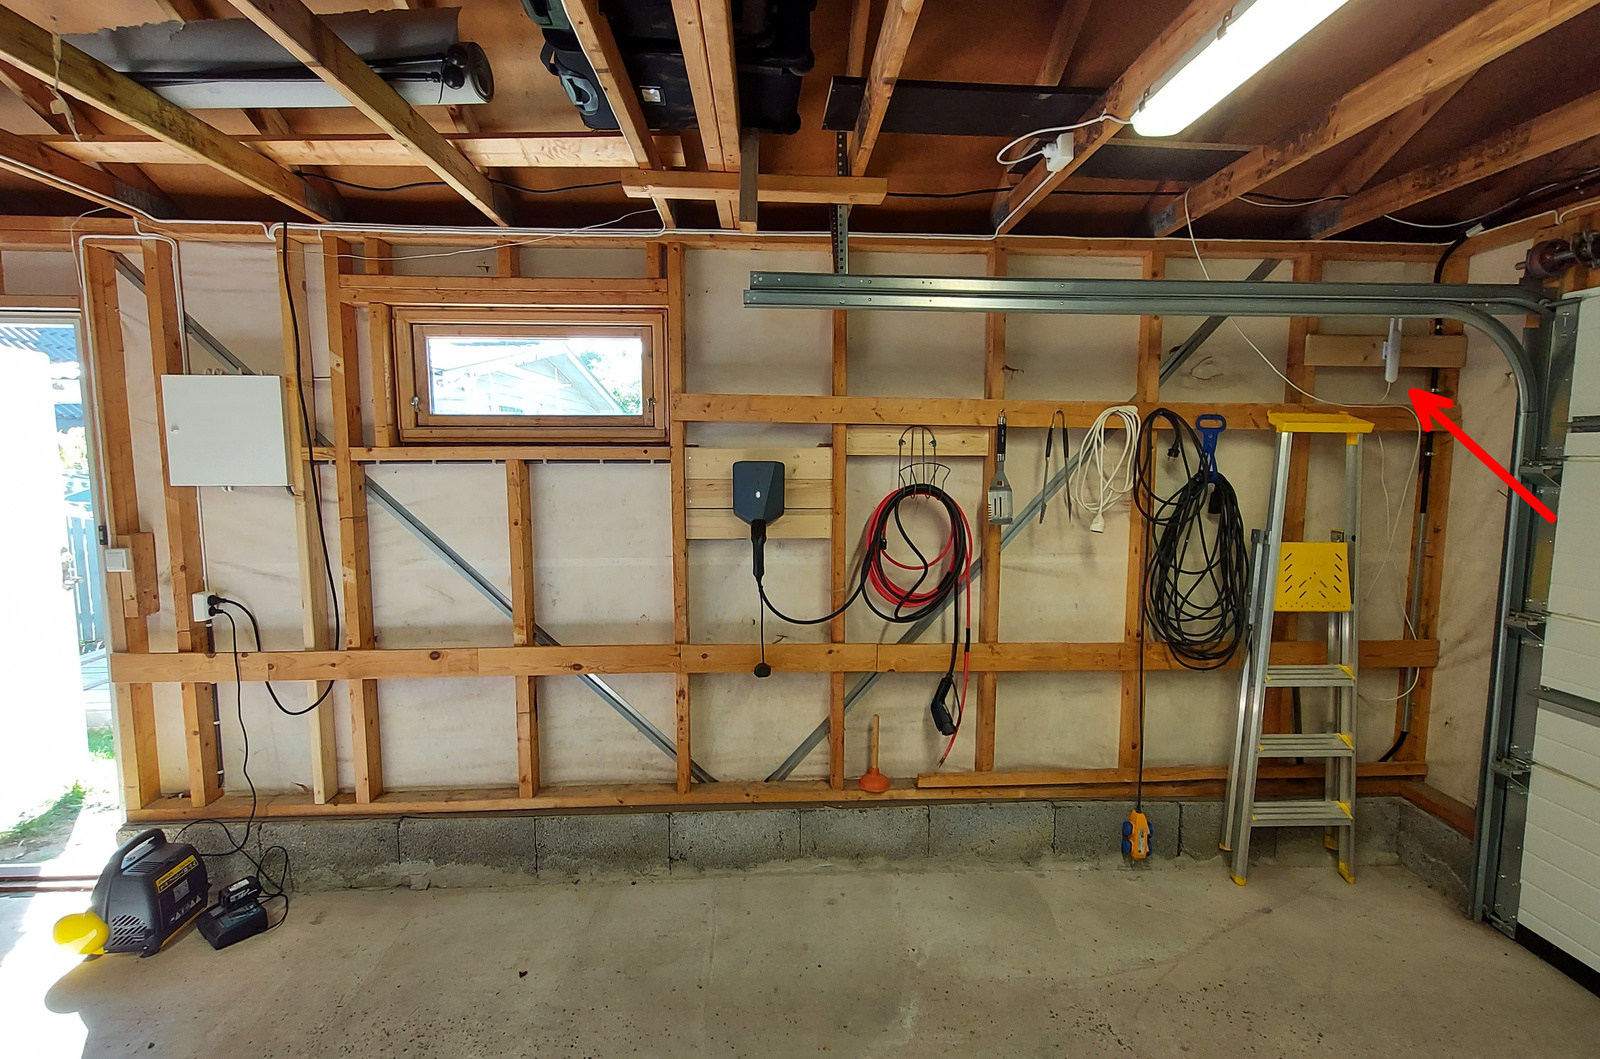
So I moved it again, this time to the center of the garage, and much lower down. No obstructions in front, and just the outer wall behind. With this setup I get great signal inside the garage, and pretty good signal in the side garden. 👍
2nd floor
New access point in hallway
To improve the Wi-Fi signal in the kids’ rooms I installed the UAP-AC-Lite (from my home office) in the hallway outside their rooms. I did consider mounting one access point in each room, but it seemed overkill — at least for now.
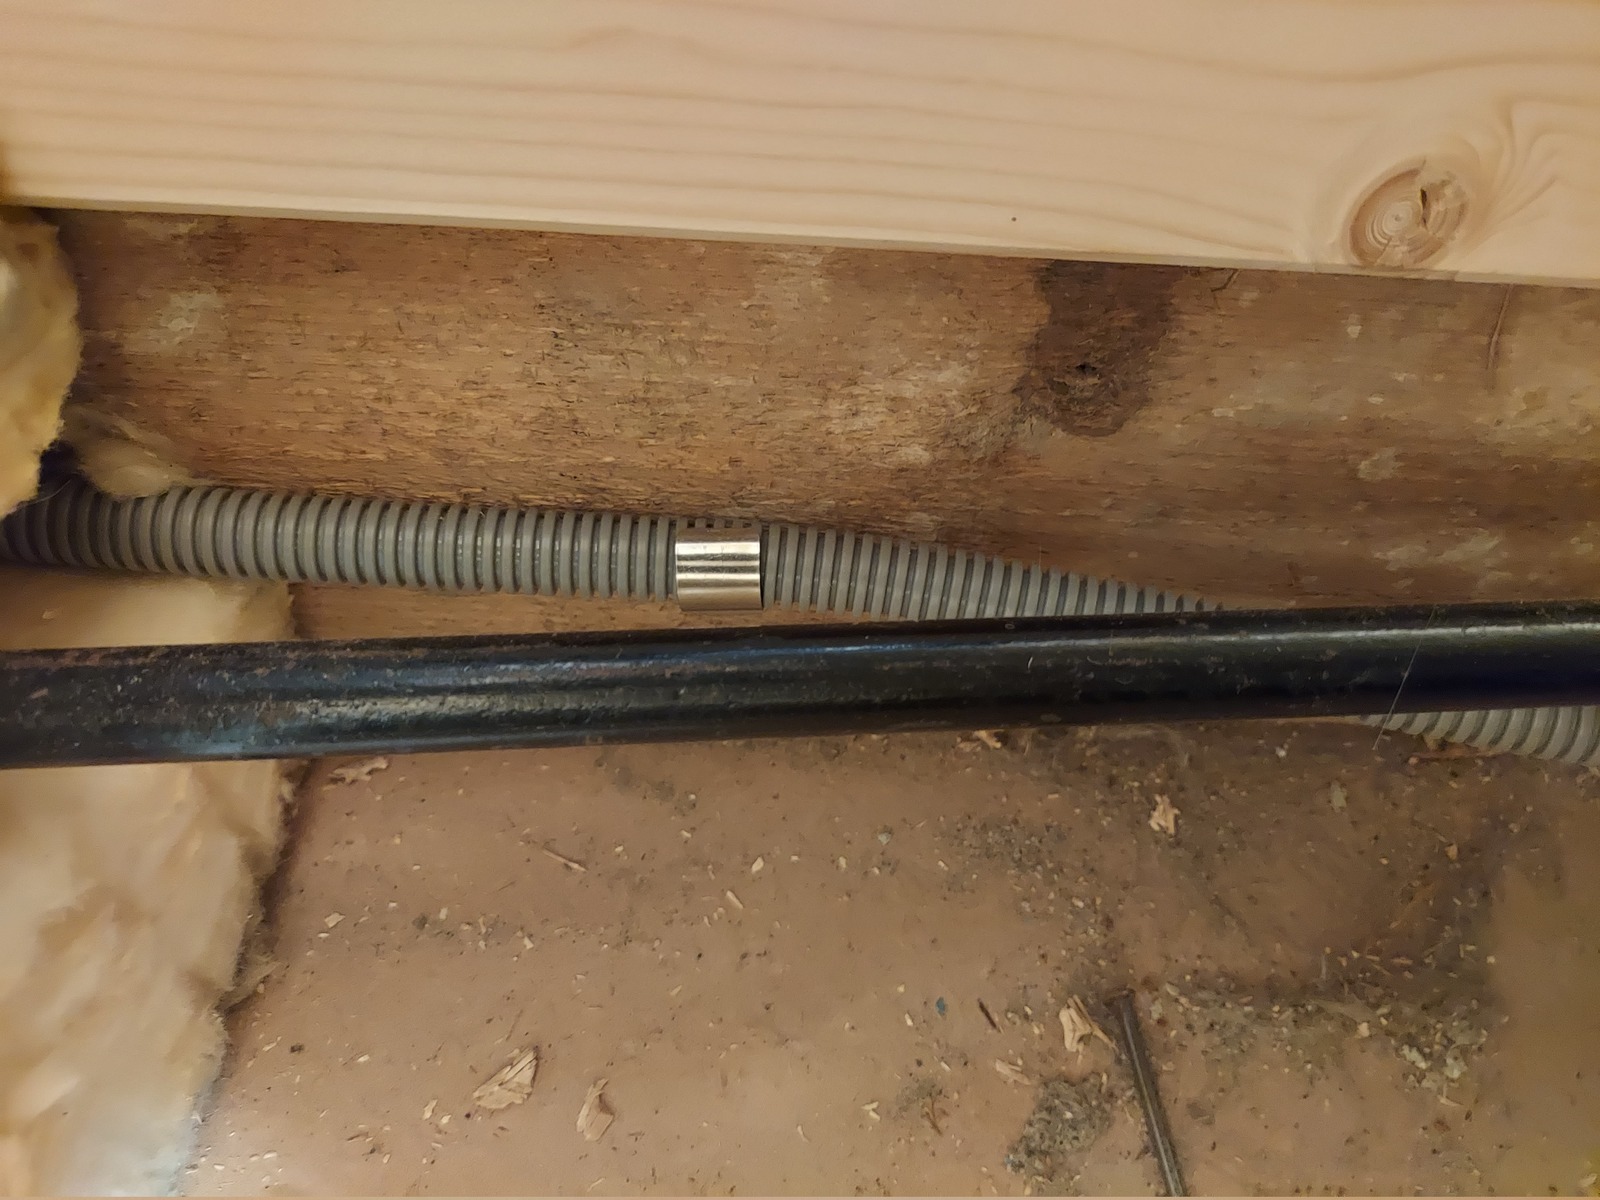
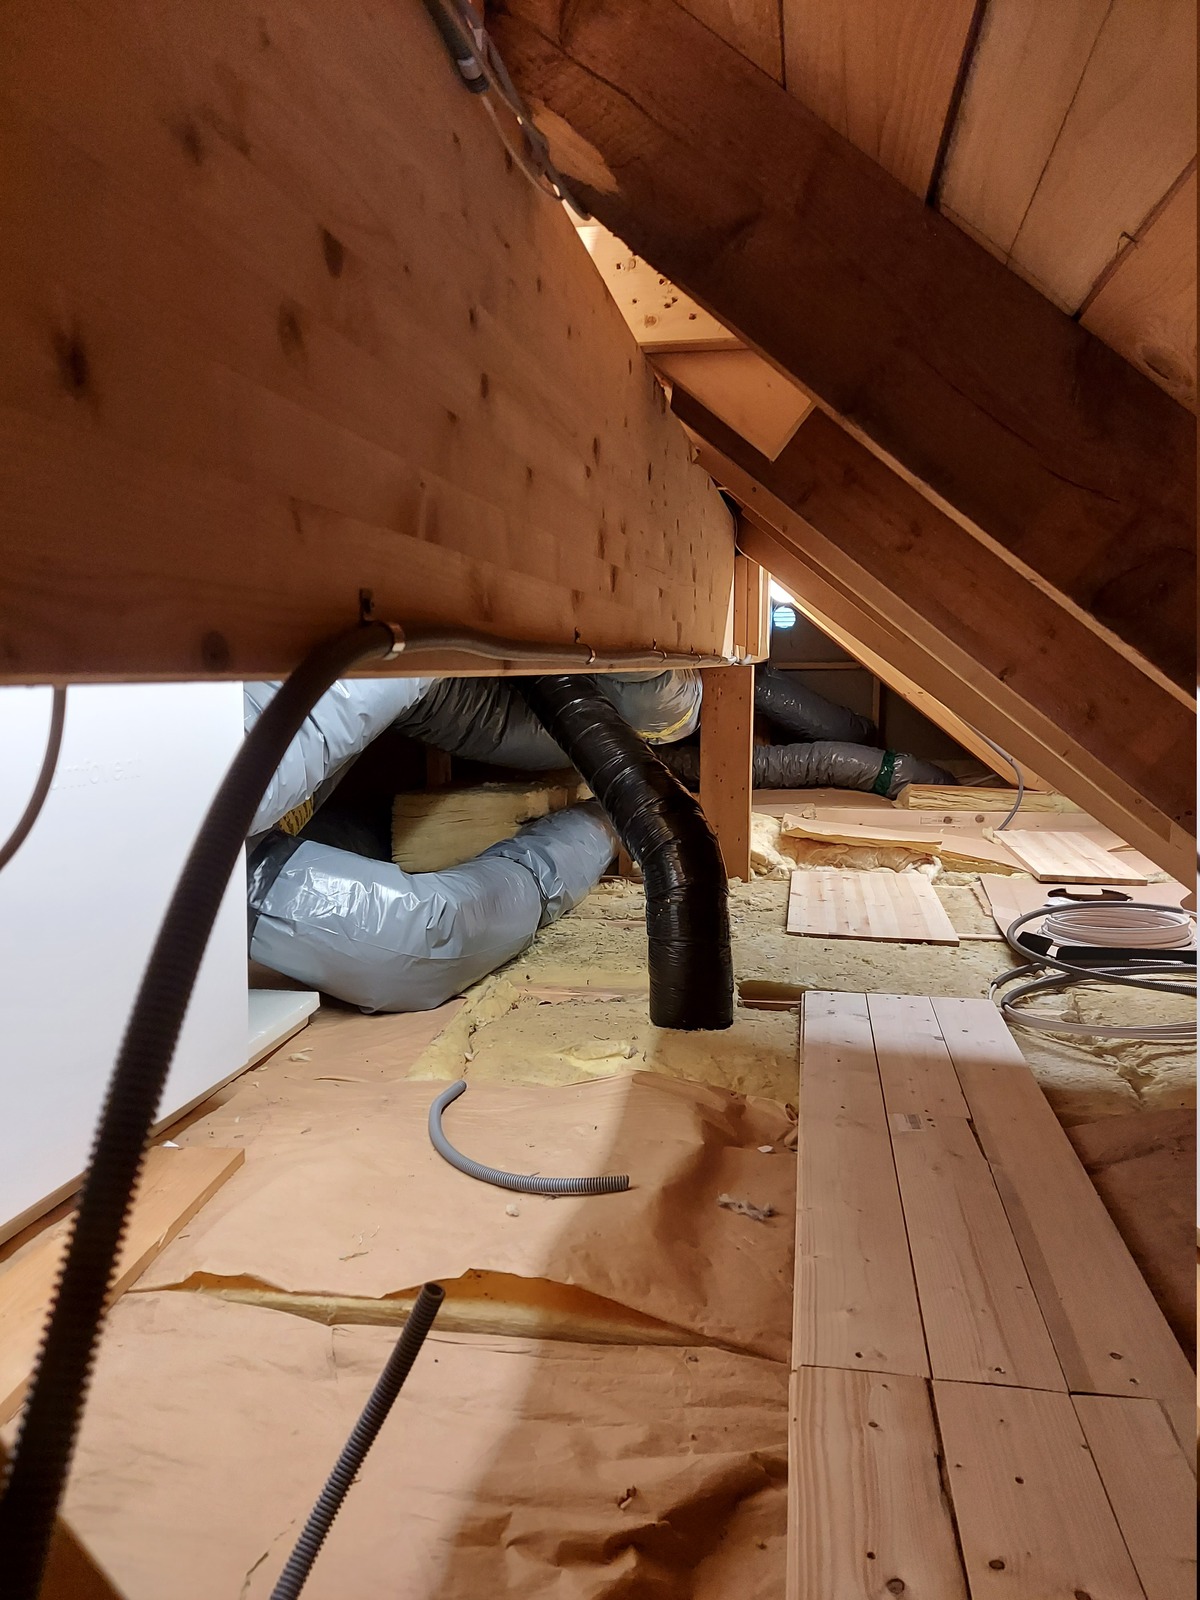
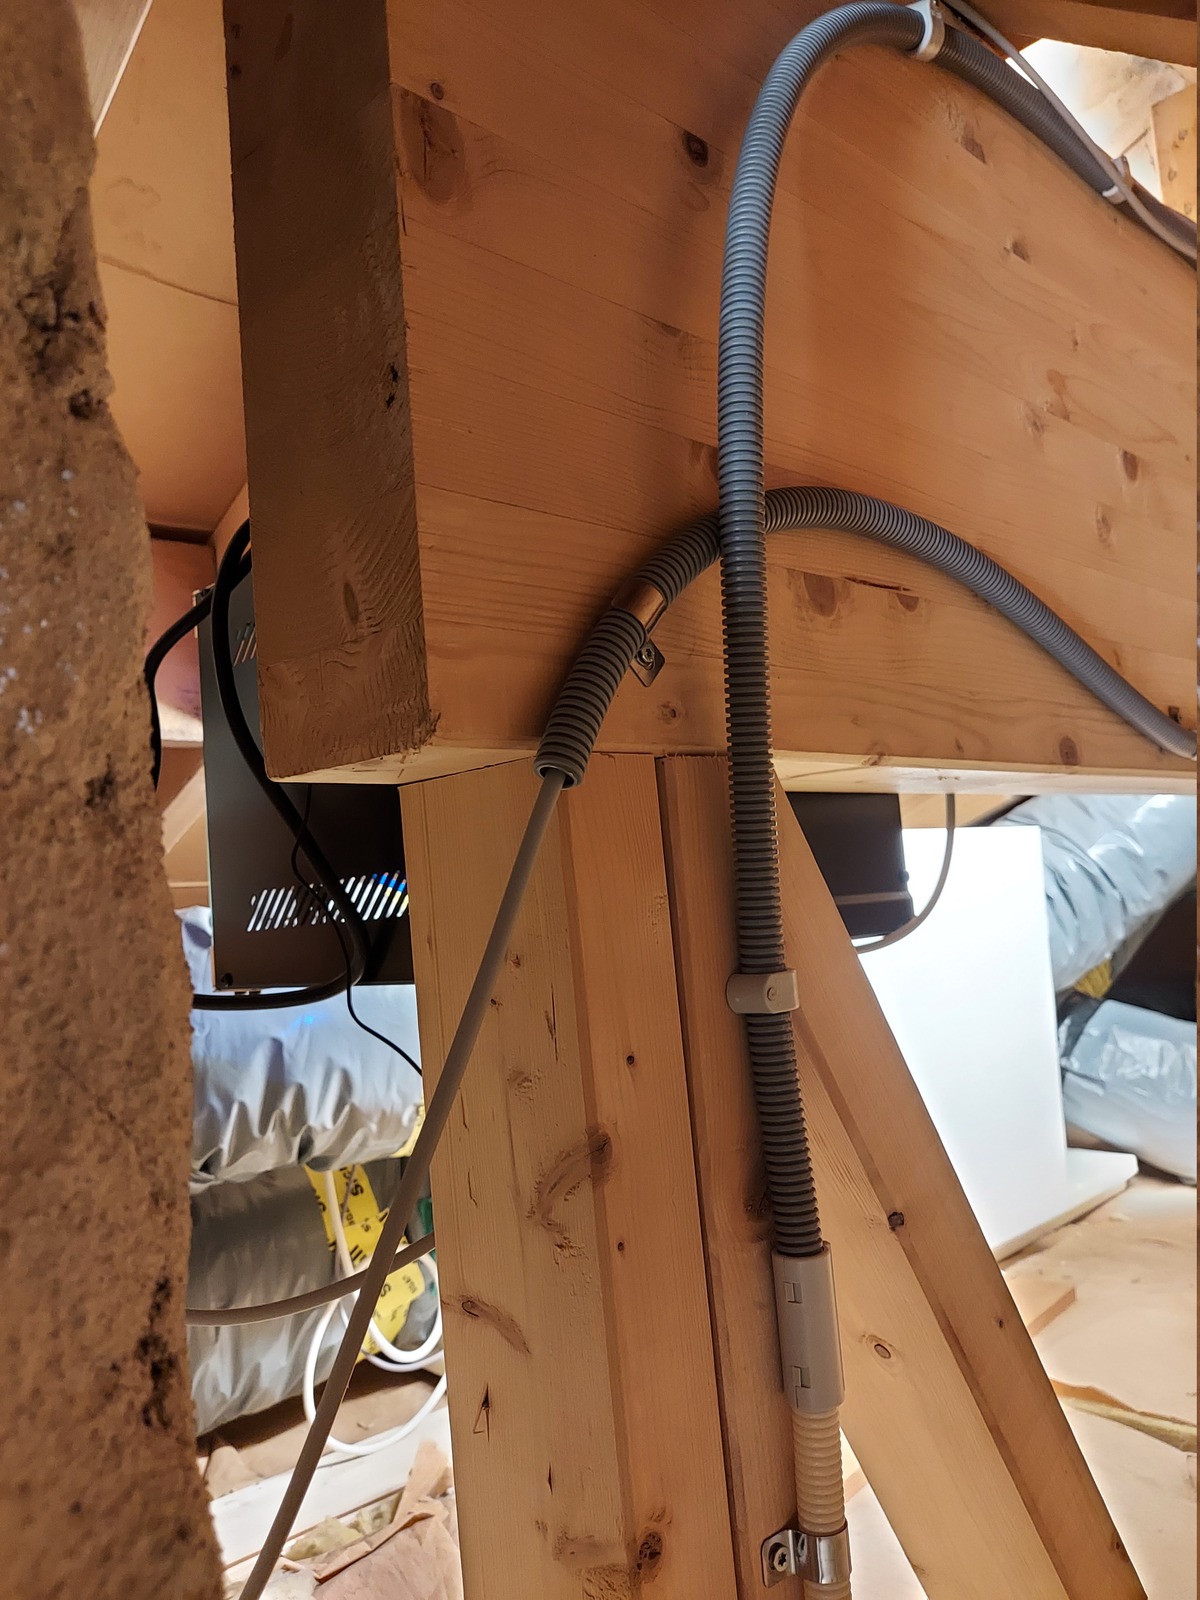
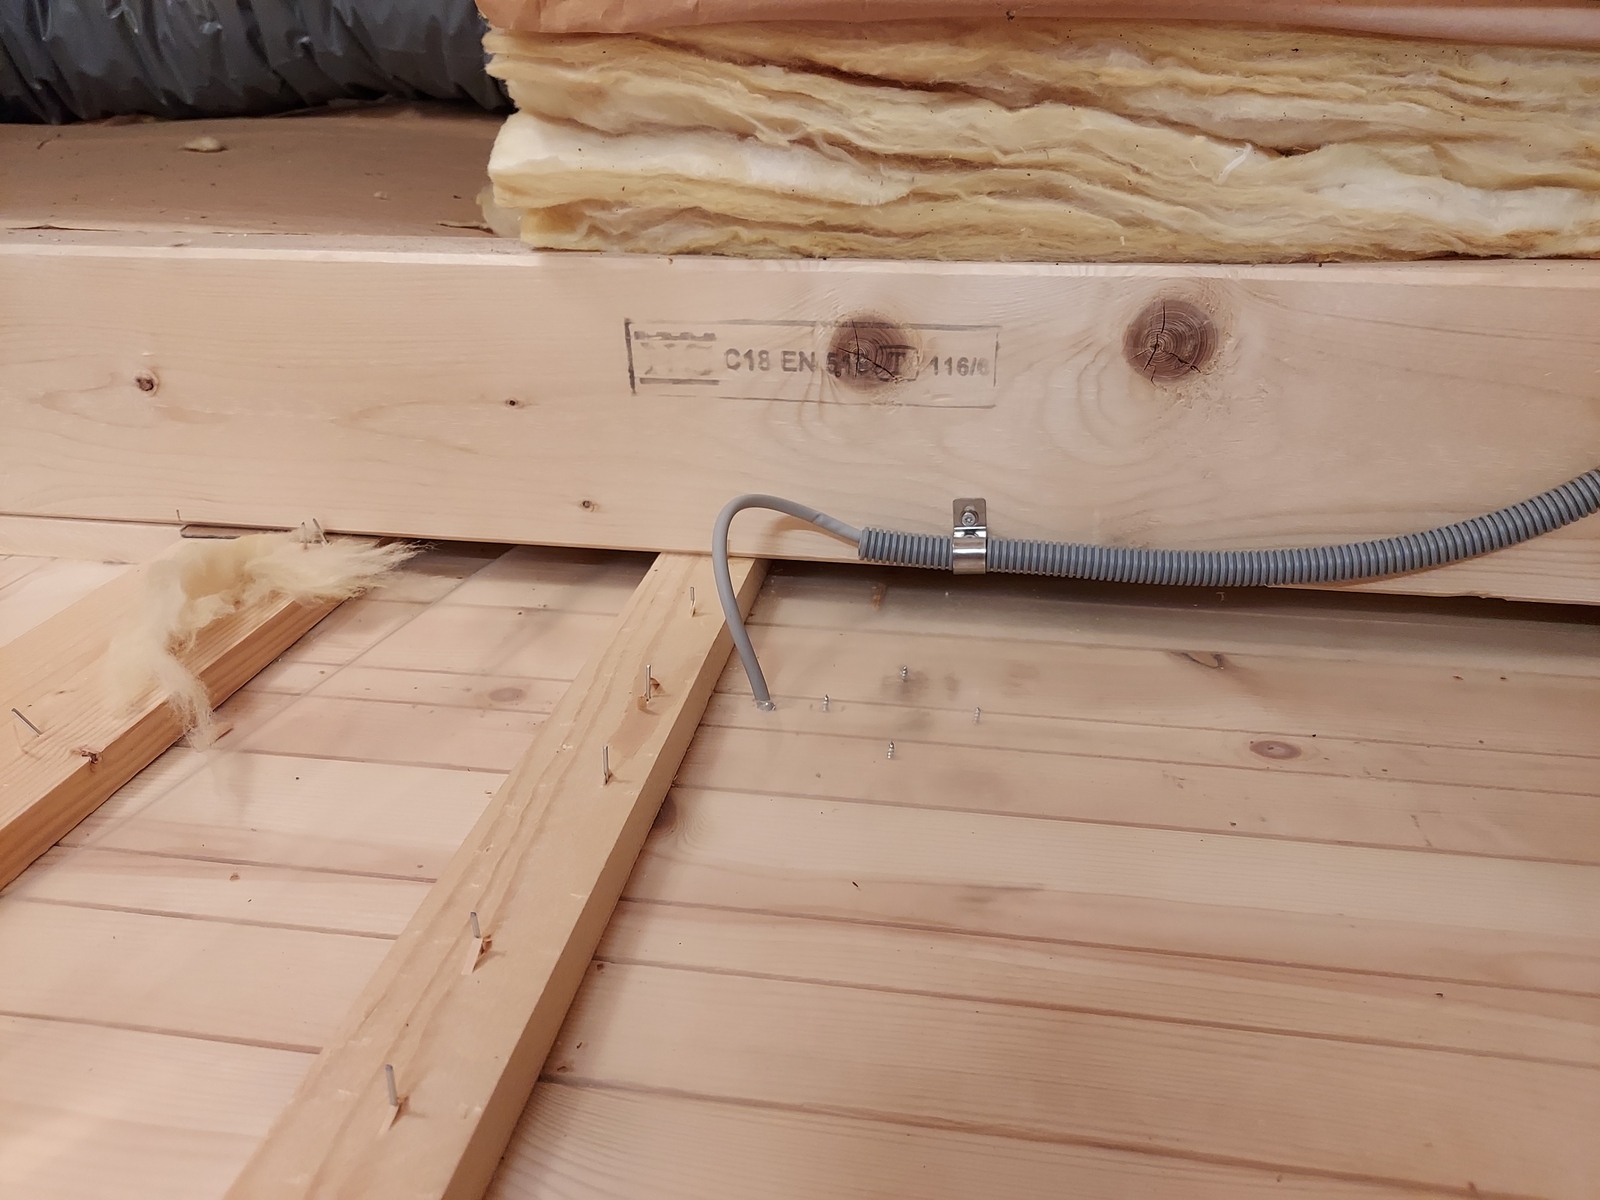
I used 16 mm flexible conduit to run the CAT6 cable in the attic.

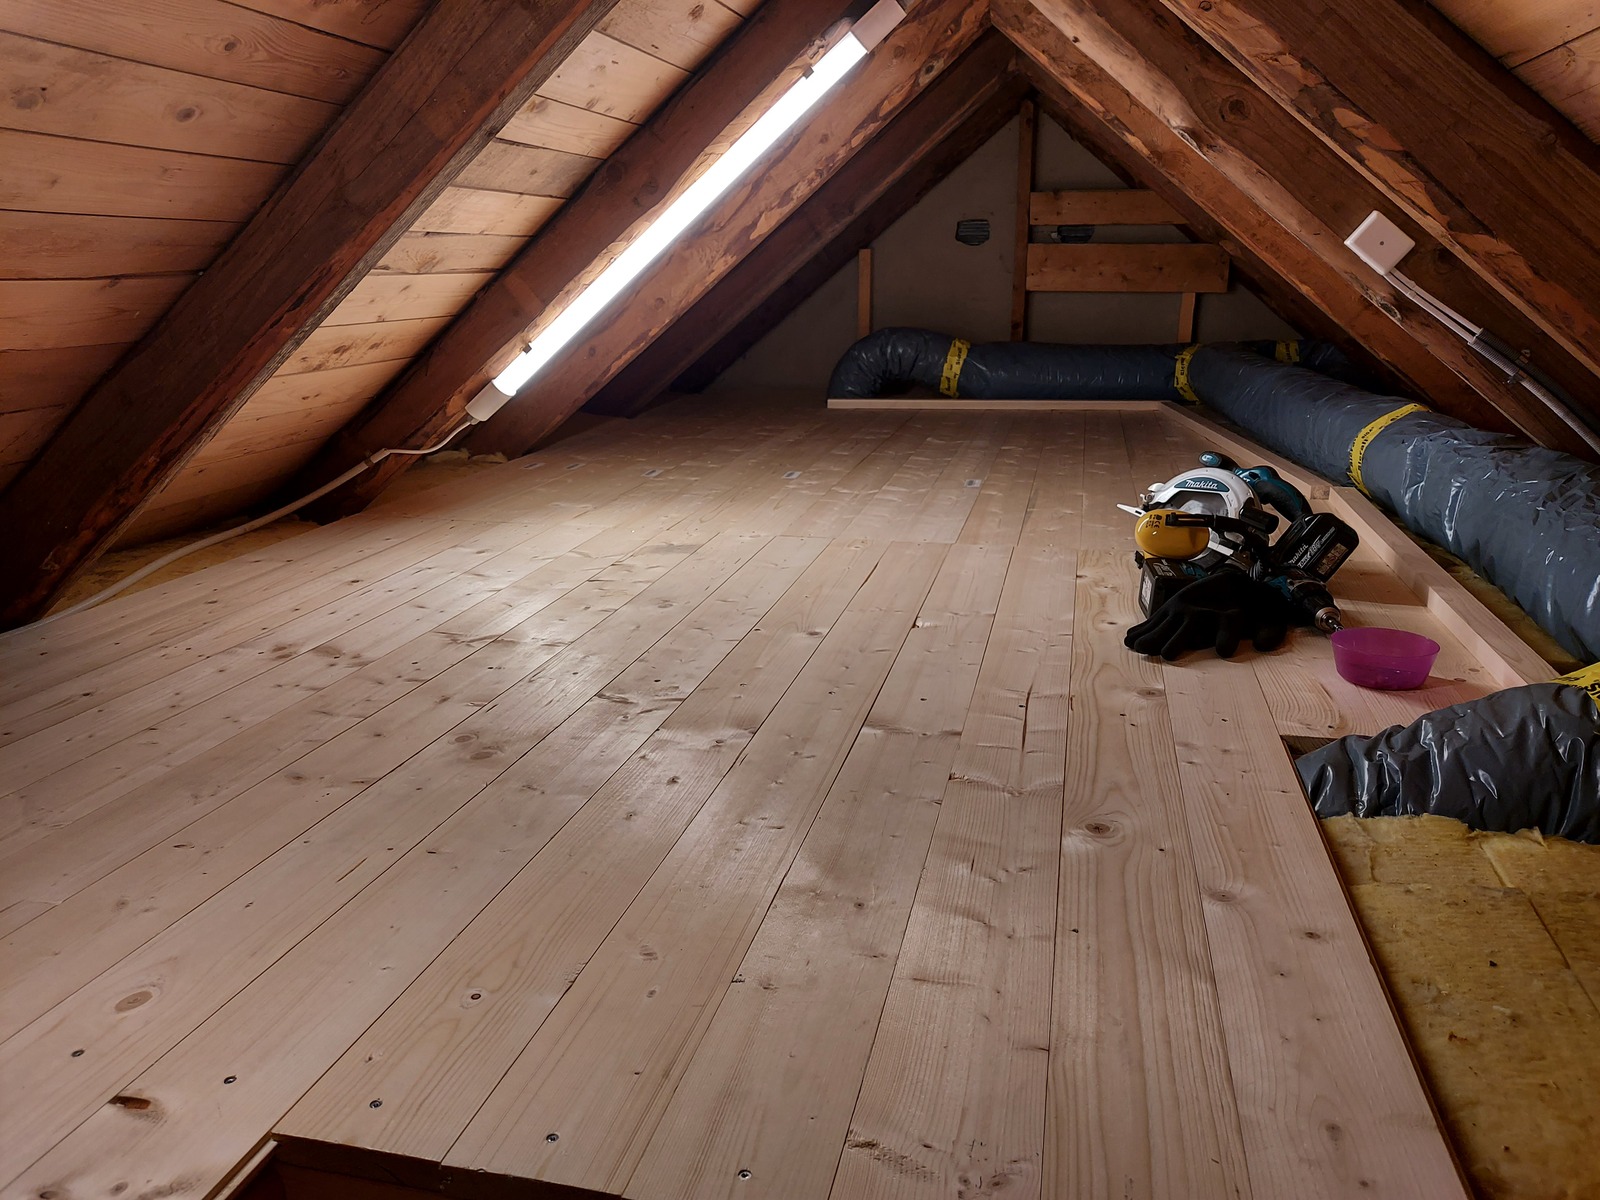
To make it easier to work with, and crimp on the RJ45 connectors — I used stranded CAT6 patch cable. I had to lift a few floor boards in the attic to get access to the 2nd floor ceiling.
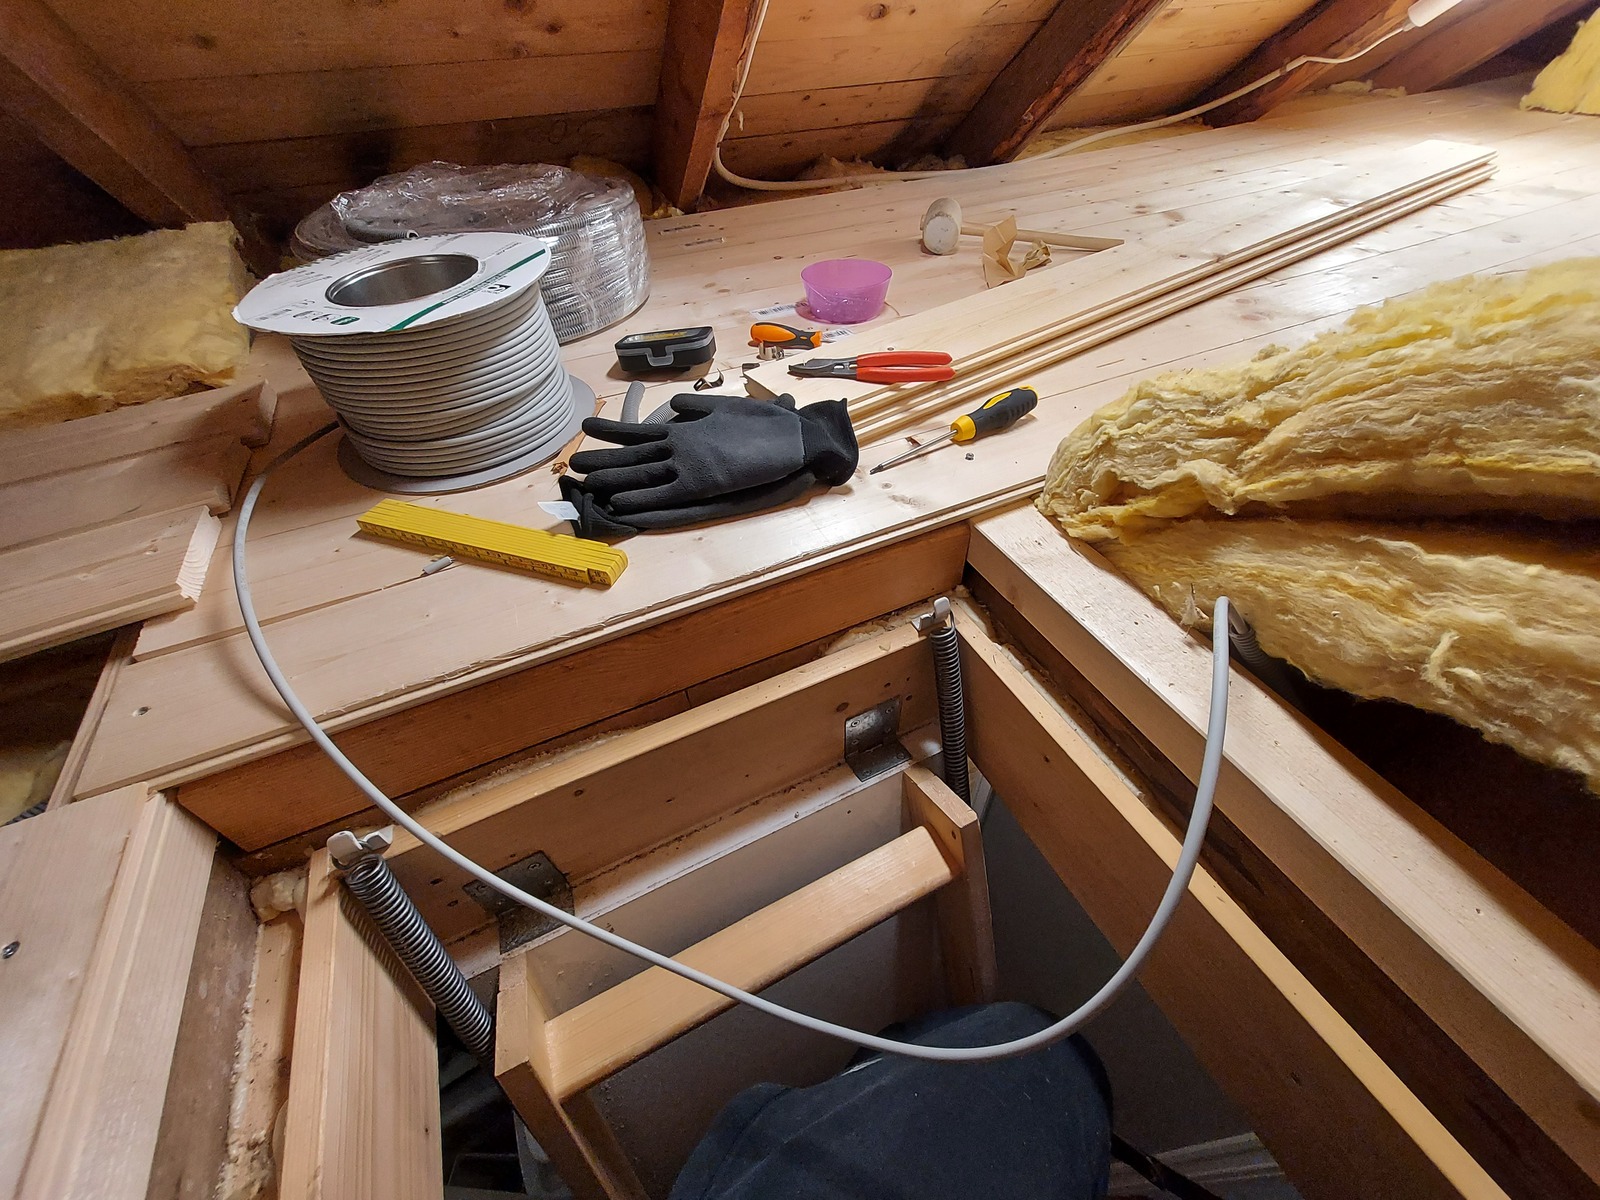
I ran the flexible conduit along the joist under the attic floor boards.
The ceiling in the 2nd floor was a bit uneven where I wanted to mount the access point, so I used some washers as spacers to avoid bending the mounting plate too much.

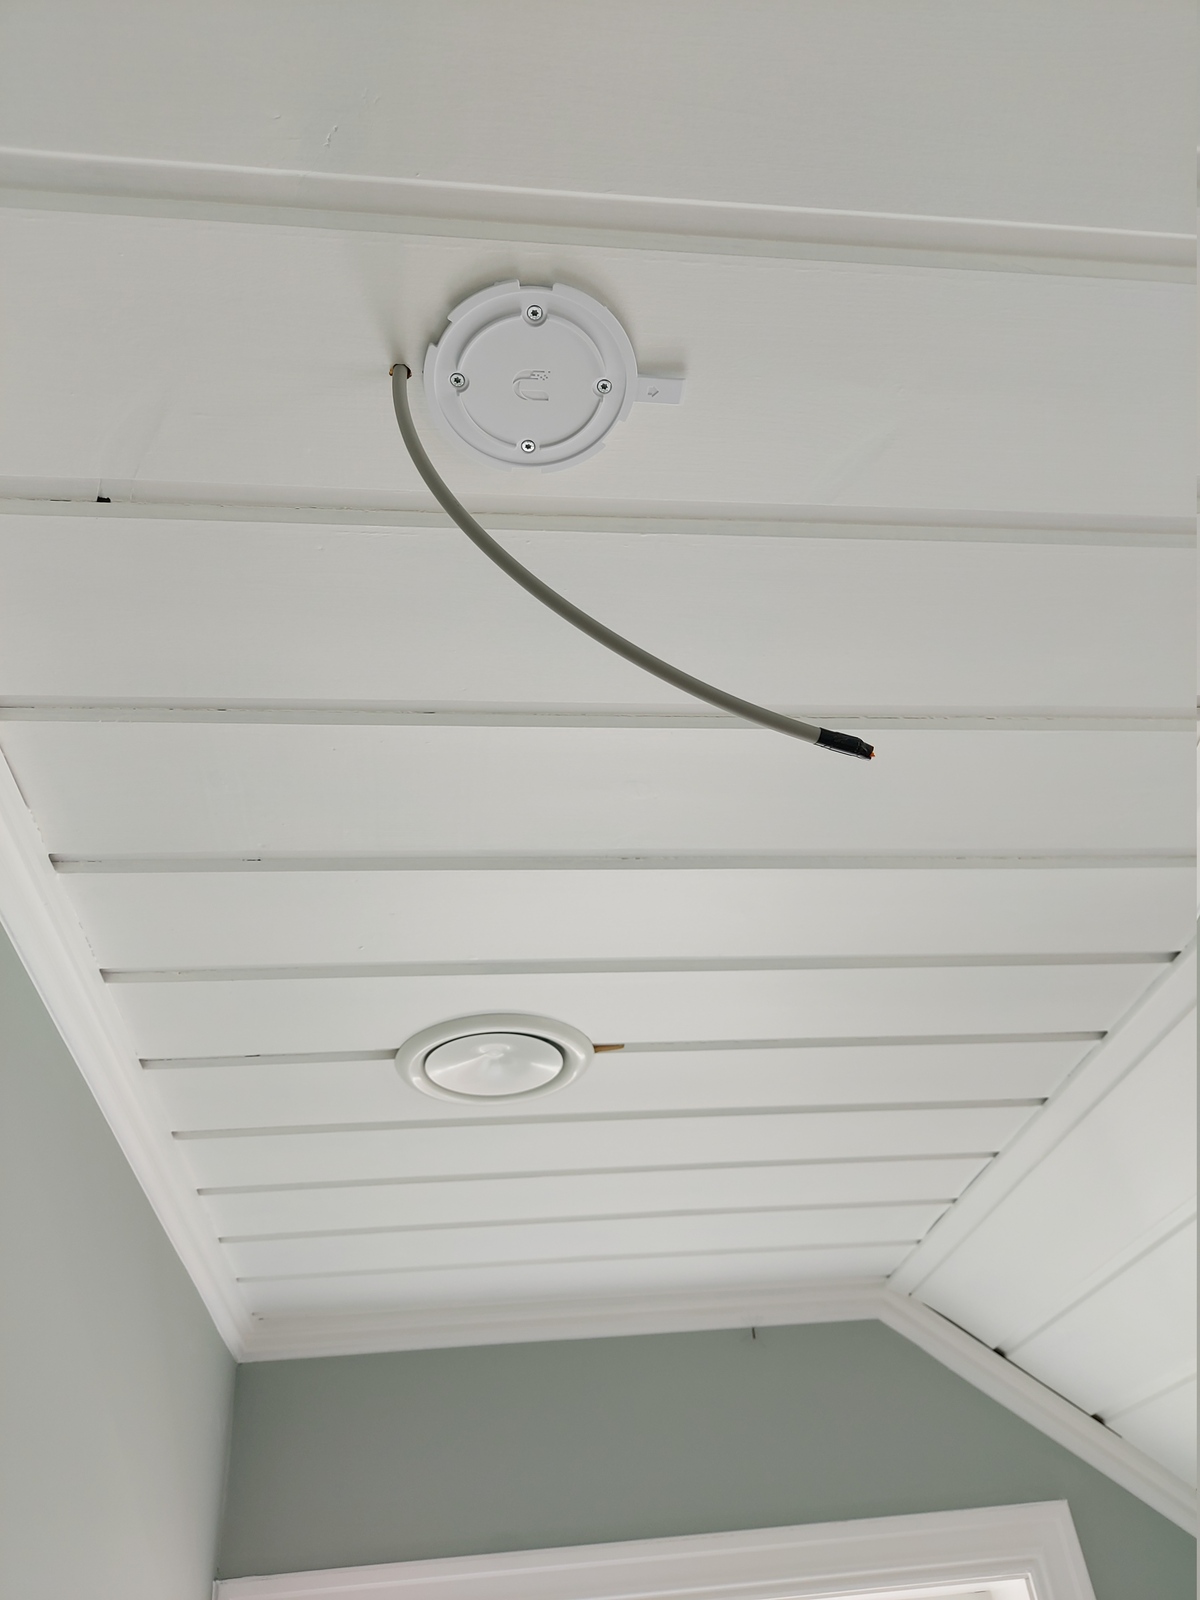
The flexible conduit ends before the CAT6 goes through the 2nd floor ceiling.

After I ran the cable — I put the floor boards back, and it was like I was never there 🙂
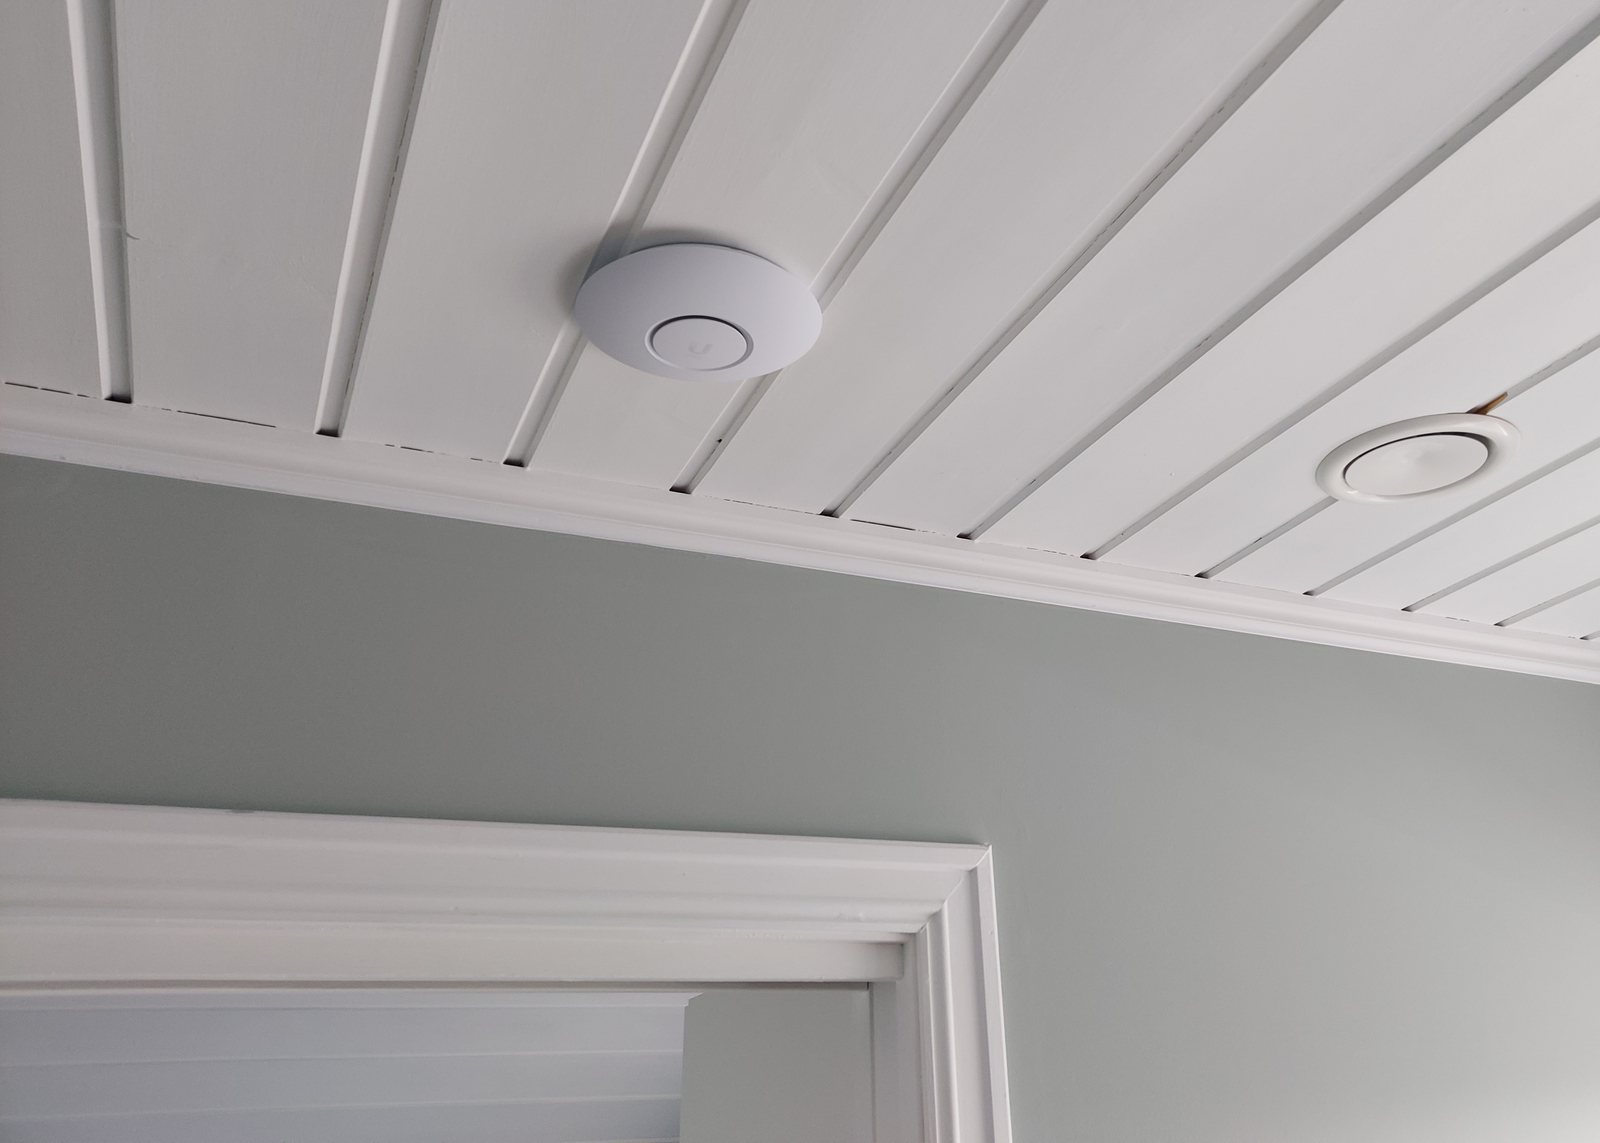
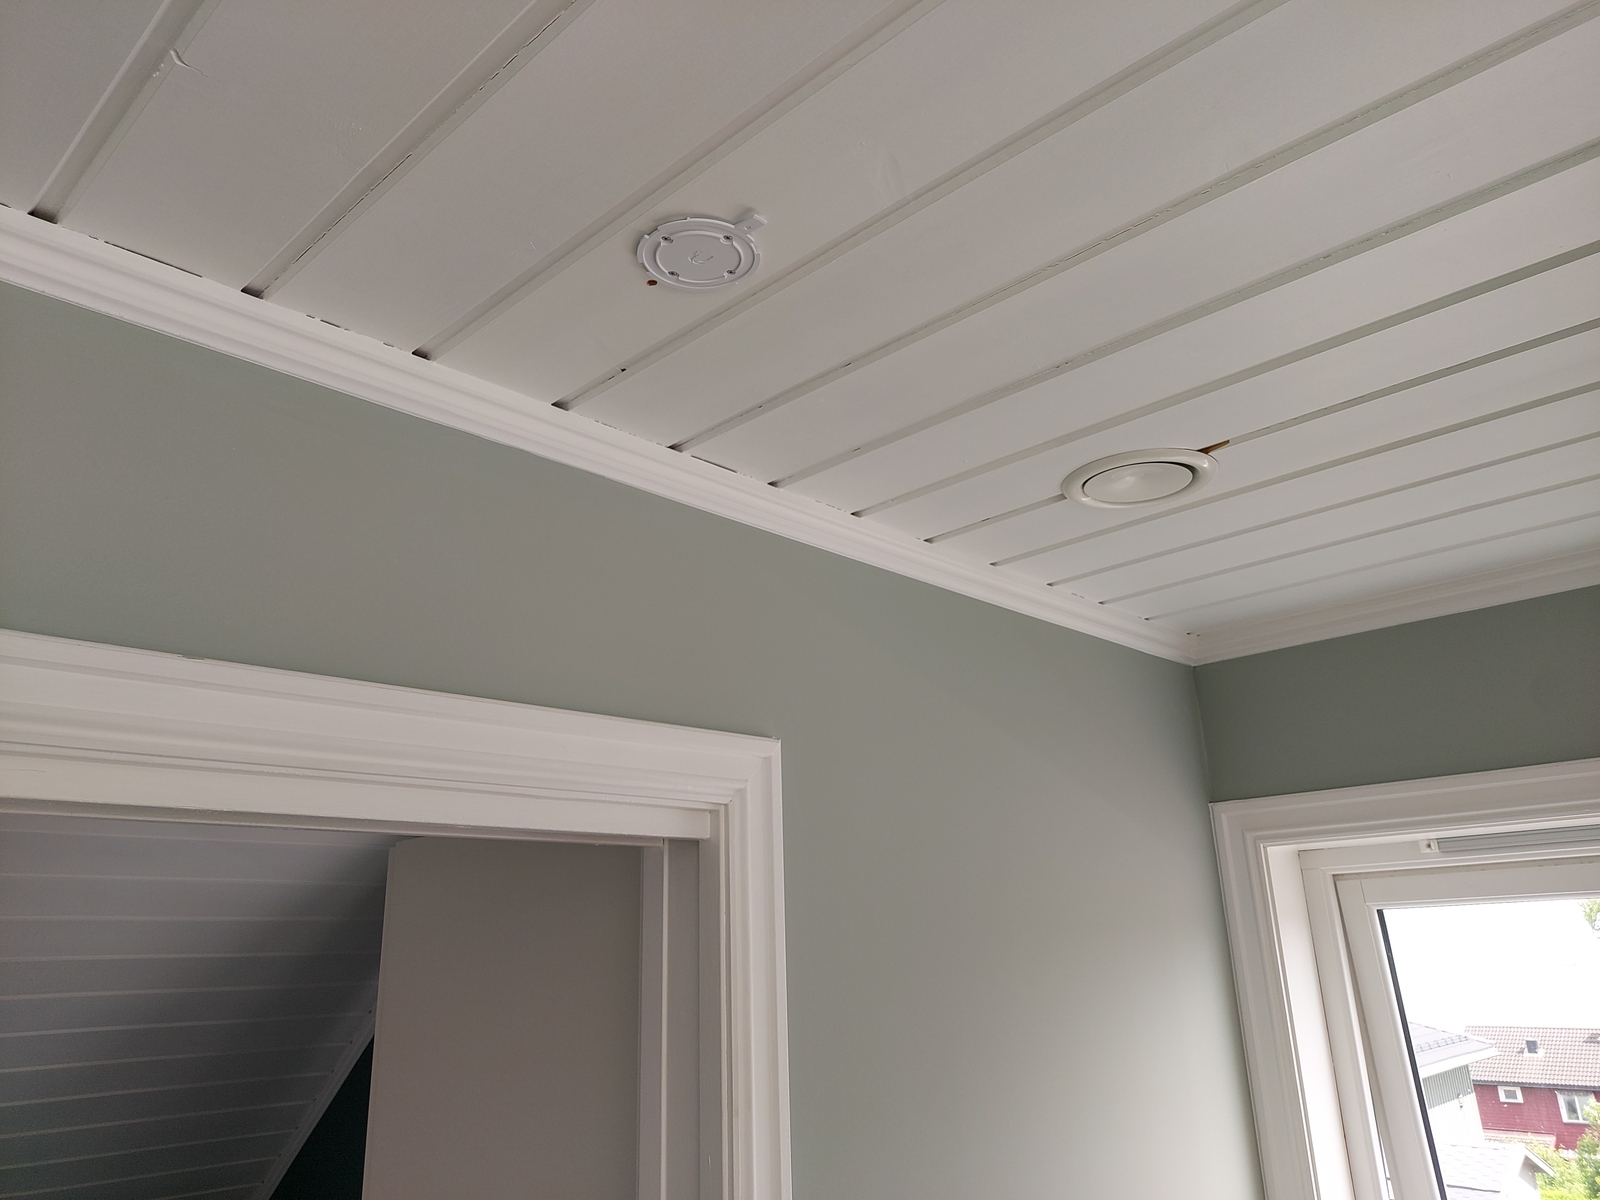
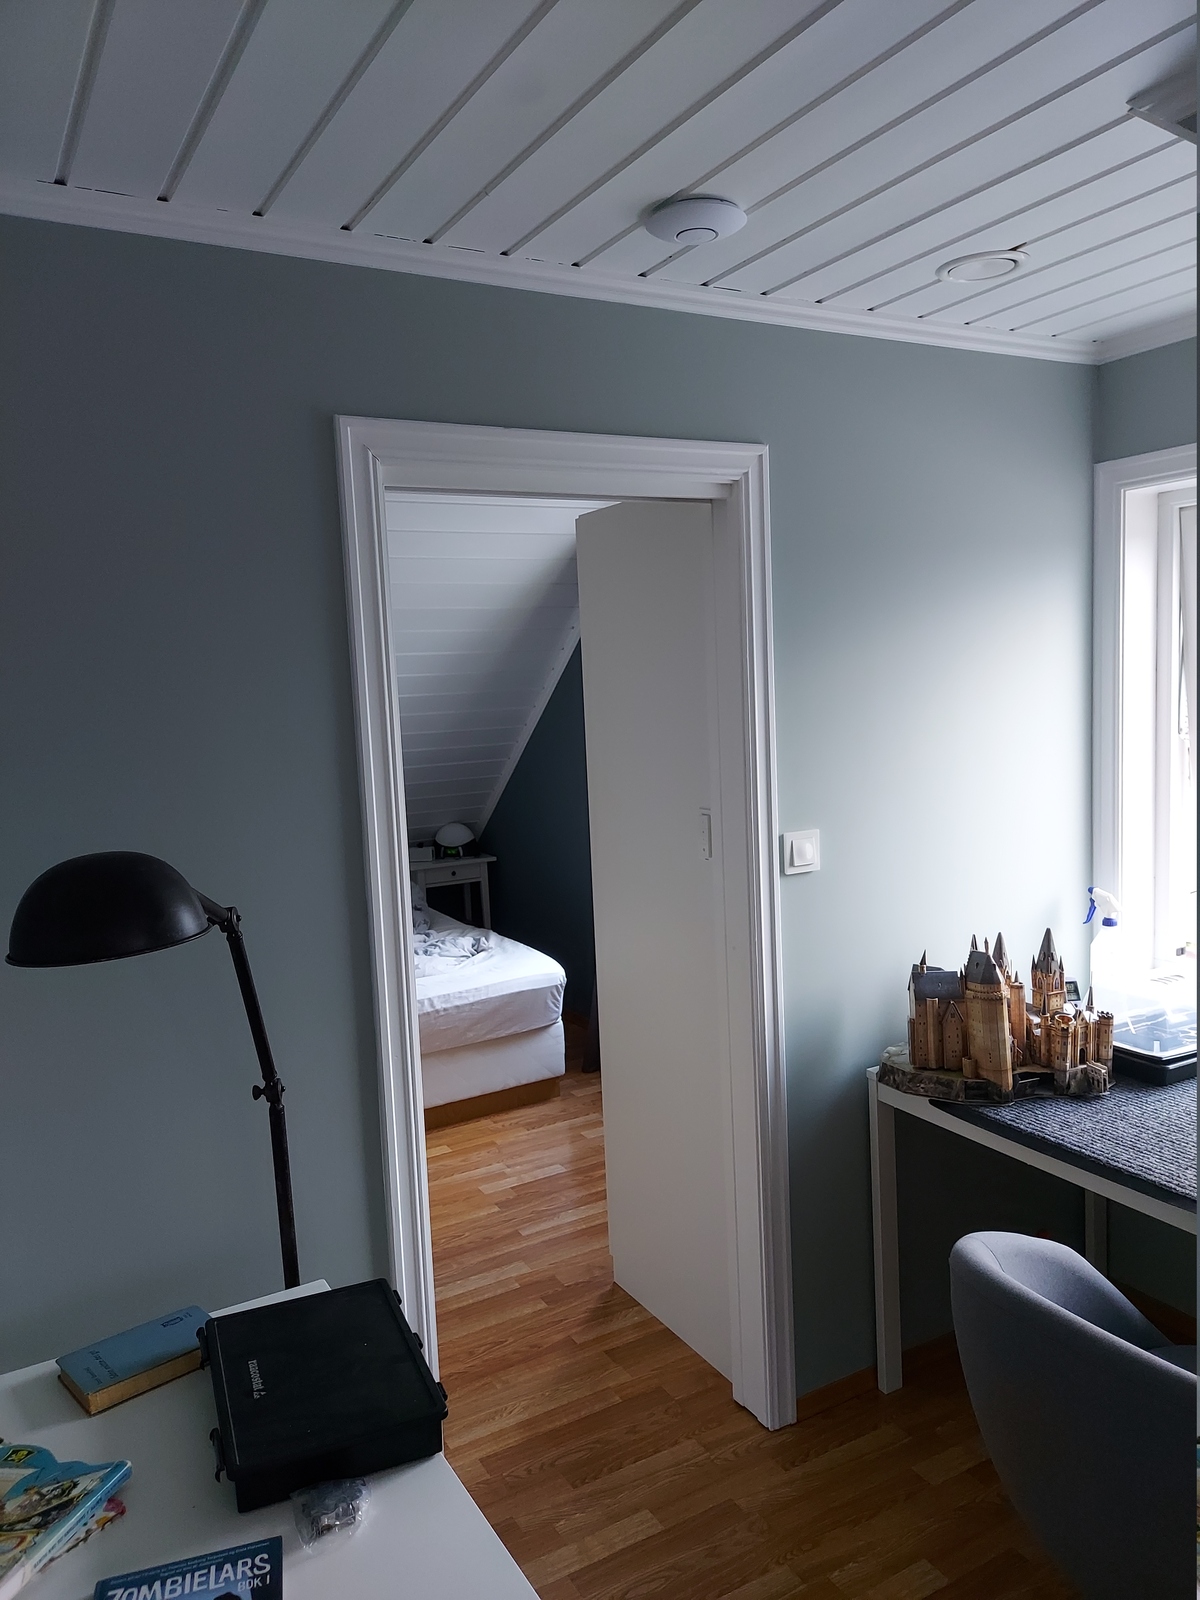
And voila! A Wi-Fi access point appears, centered between the kids’ rooms in the hallway outside 👍

New access point in den
I always considered the UAP-AC-IW in the den to be a temporary solution, having an access point by the floor has some drawbacks. Things easily get in the way — like a bag of laundry, carelessly placed, would dramatically lower the Wi-Fi signal.
I spent more time than I’d like to admit deciding where to place it, but I did make a decision in the end 🙂 So I mounted the mounting place and drilled a hole for the cable.
Again I used 16 mm flexible conduit in the attic.
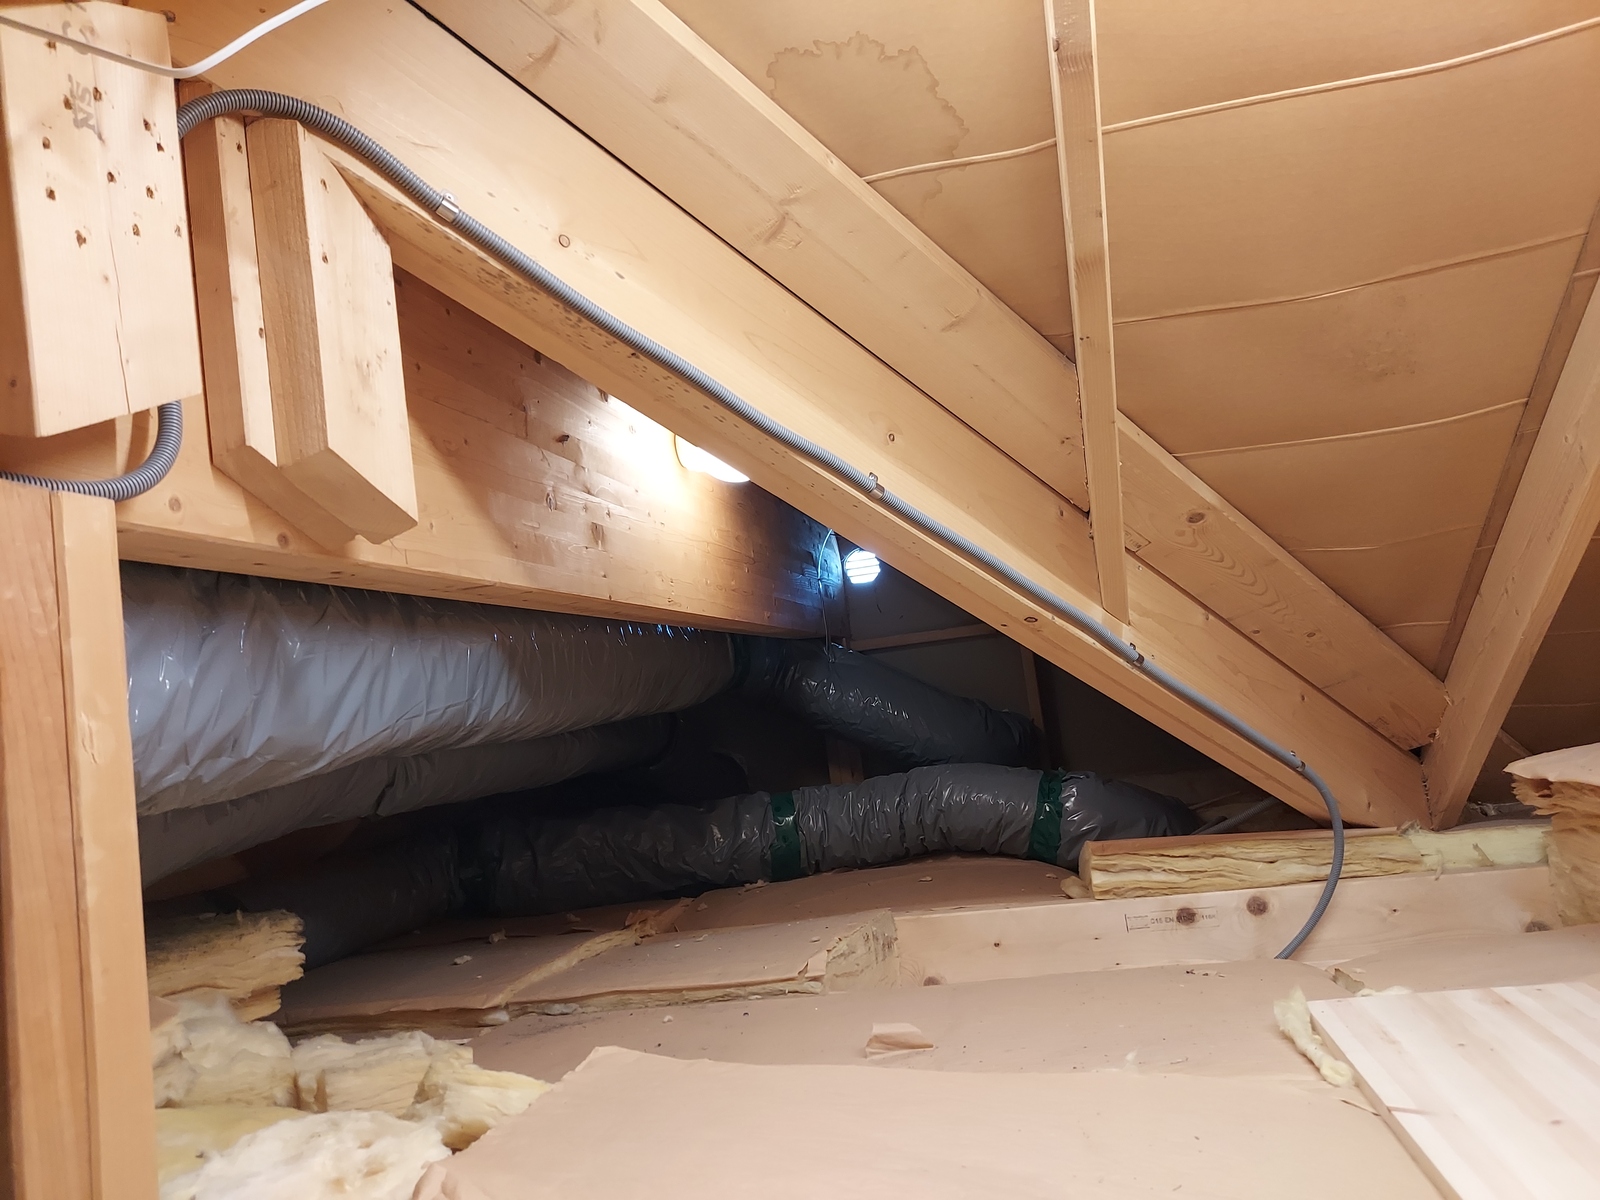
Running it along the ridge board back to the attic network cabinet.
I used stranded CAT6 patch cable here as well, for the same reasons I mentioned above.
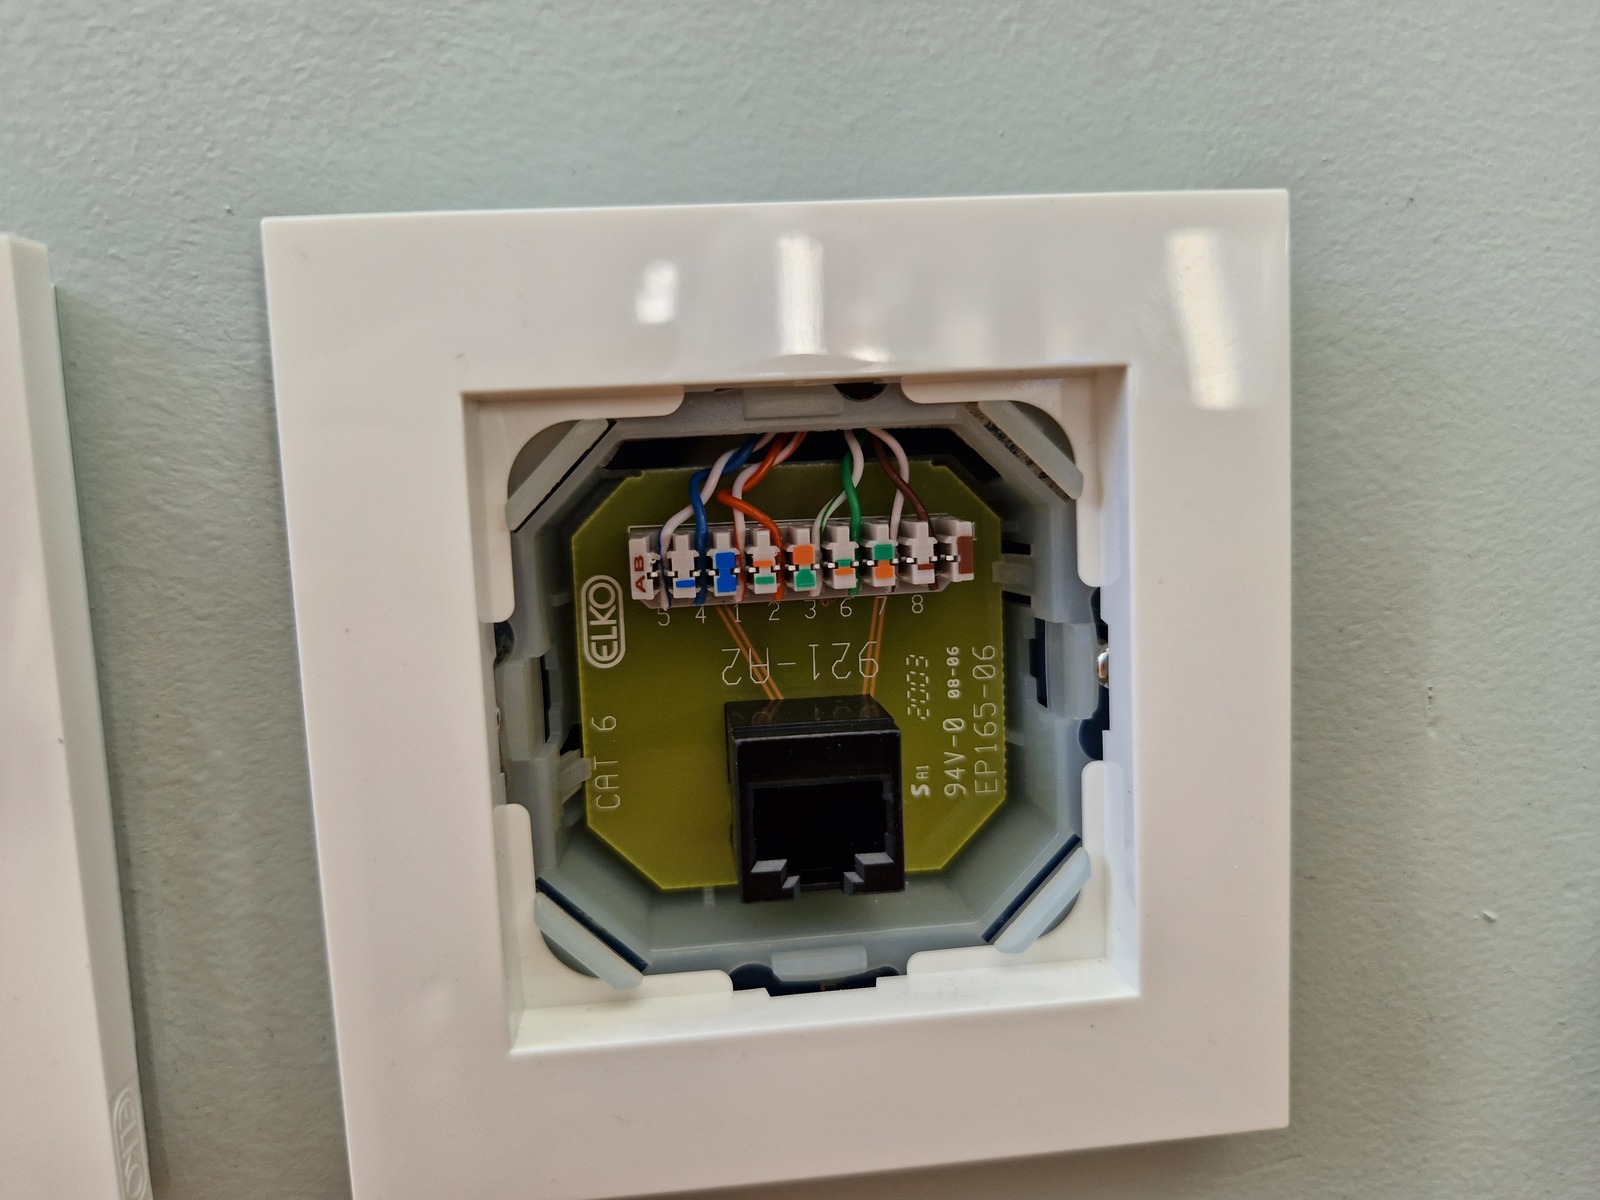
With the cable in place — it was time to crimp the connectors…
And test it 👨🏭 It’s always a good feeling when all the pairs checks out 😃

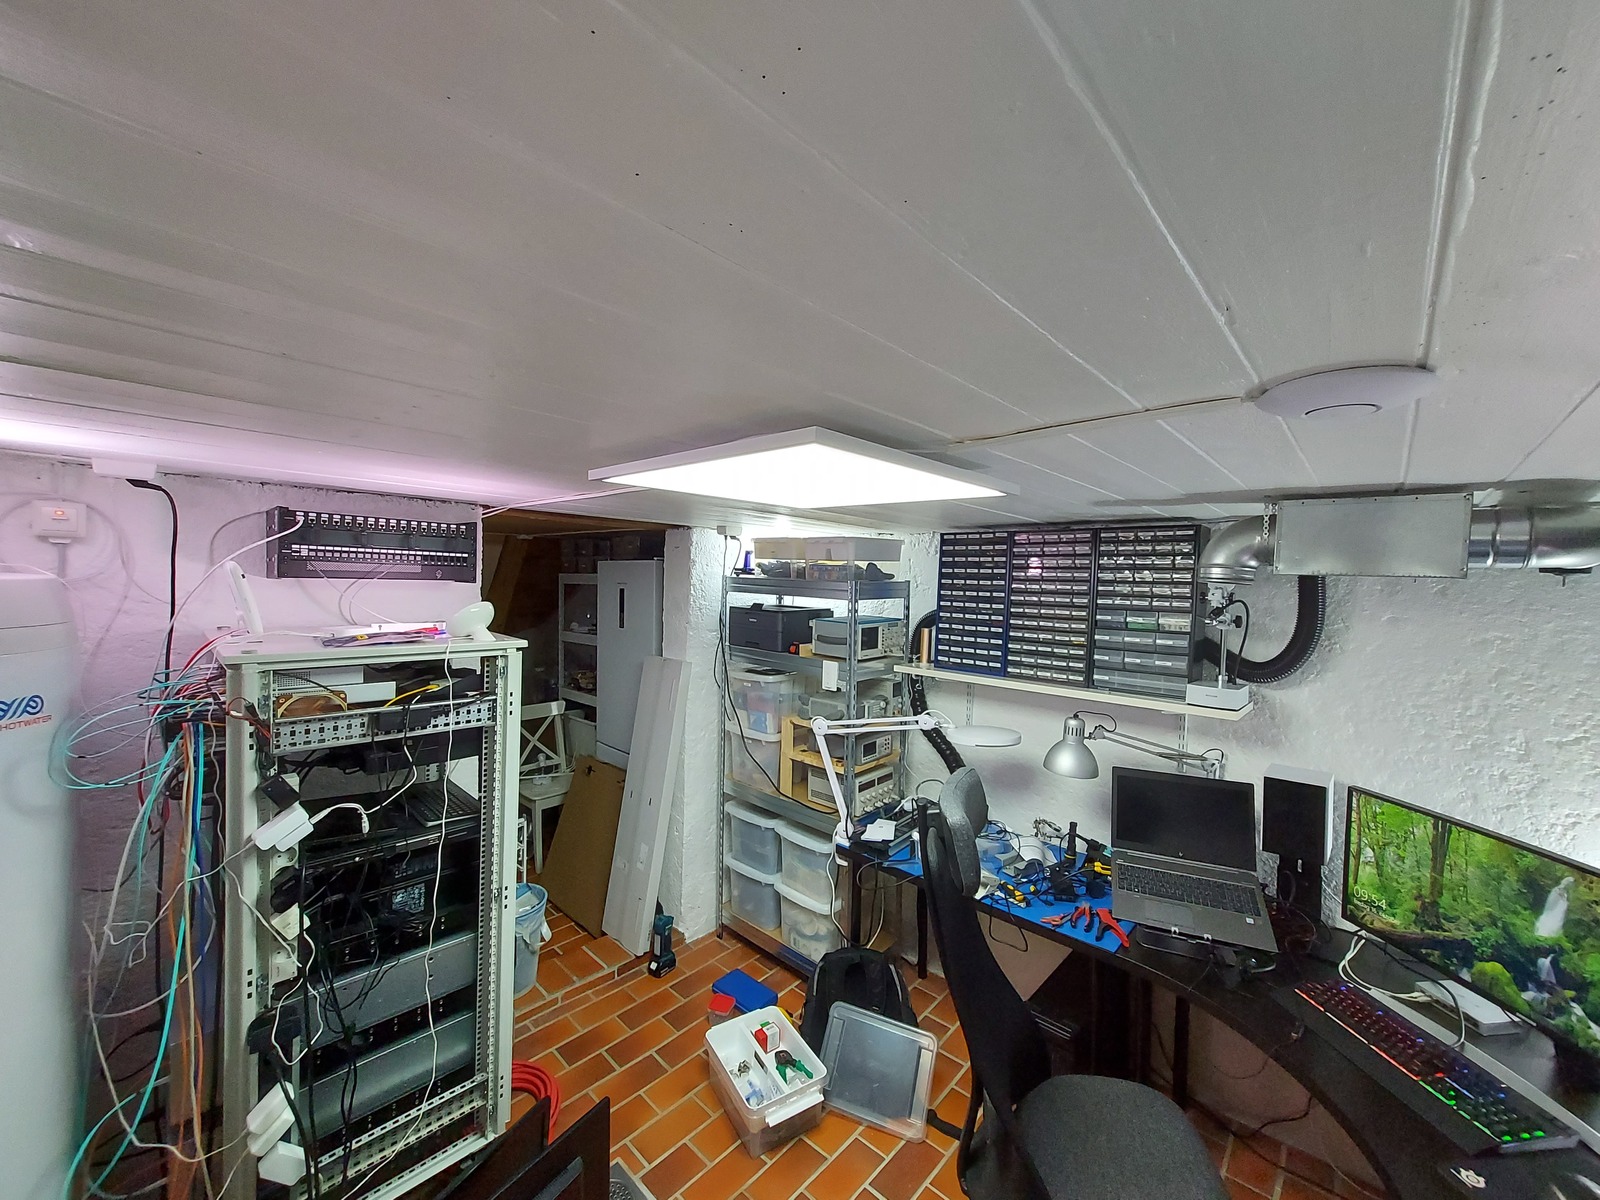
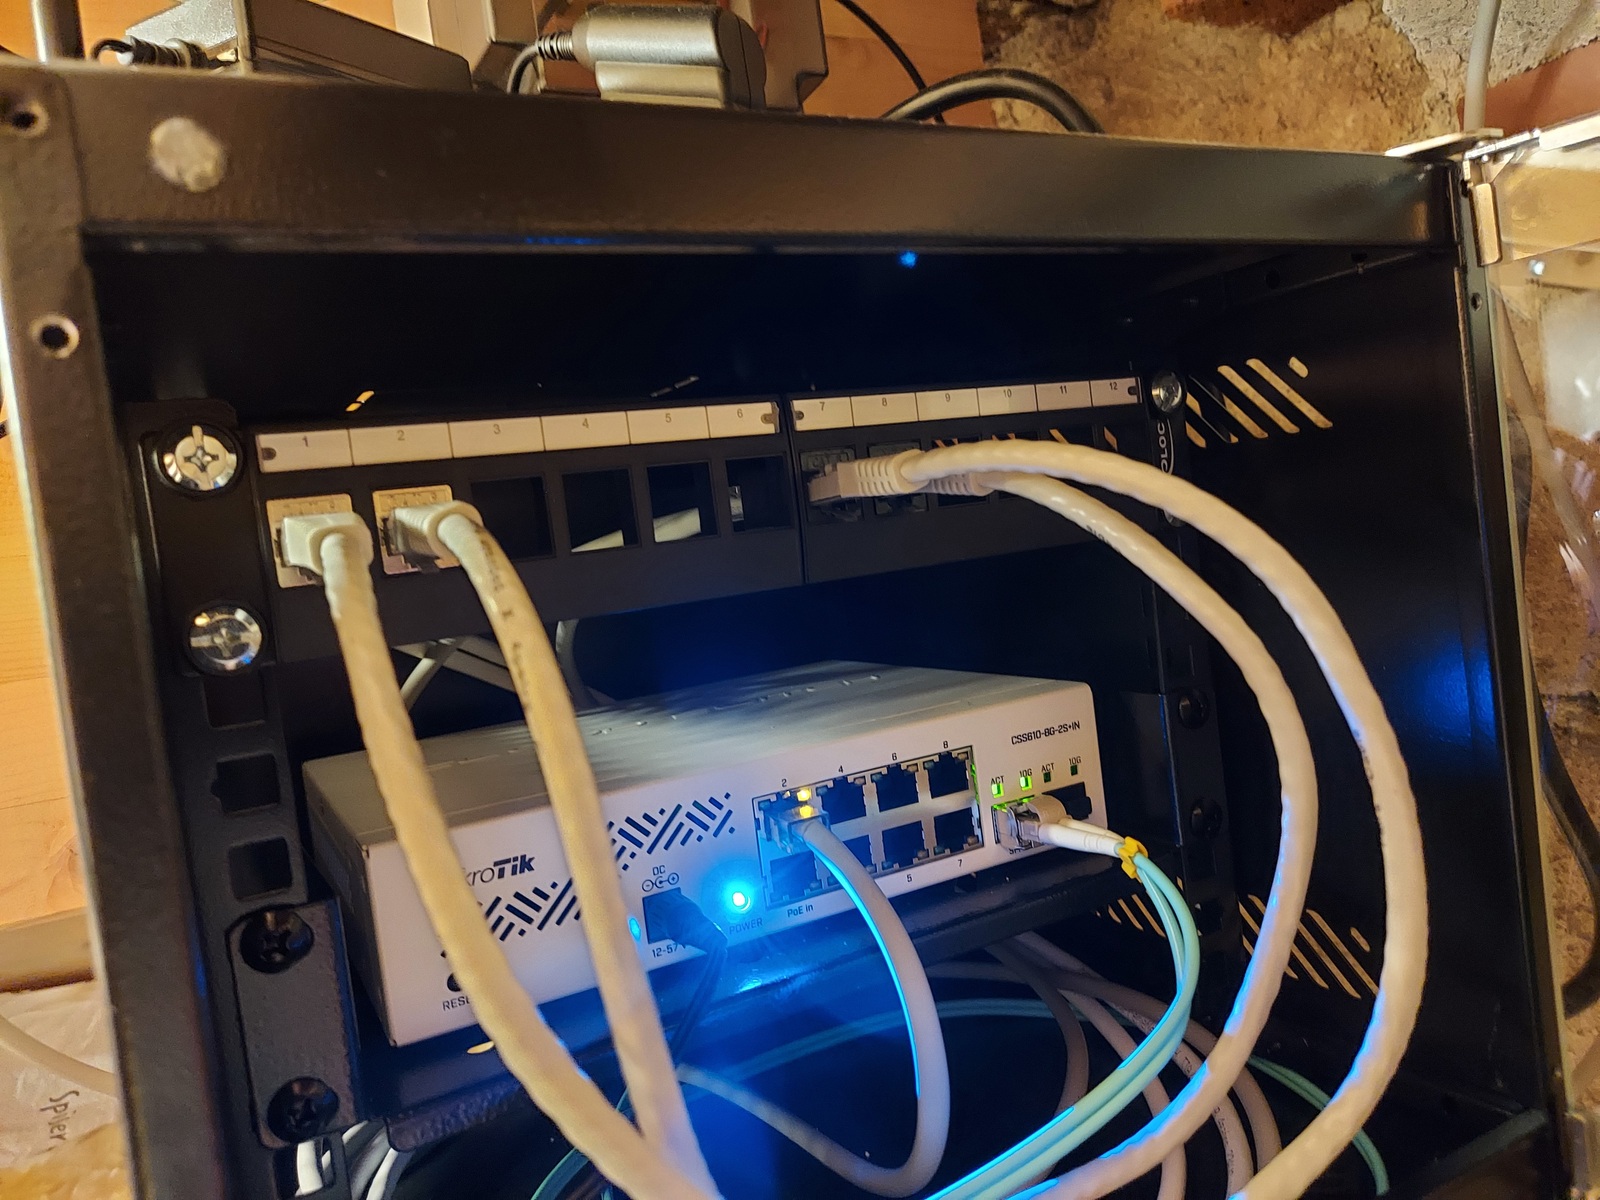
Both access points on the 2nd floor is patched through the attic network cabinet, continuing down to the home office. This means that they are powered by the PoE switch in the homelab rack, which has a UPS ⚡
As with the other access point — the flexible conduit ends before the CAT6 goes through the 2nd floor ceiling.
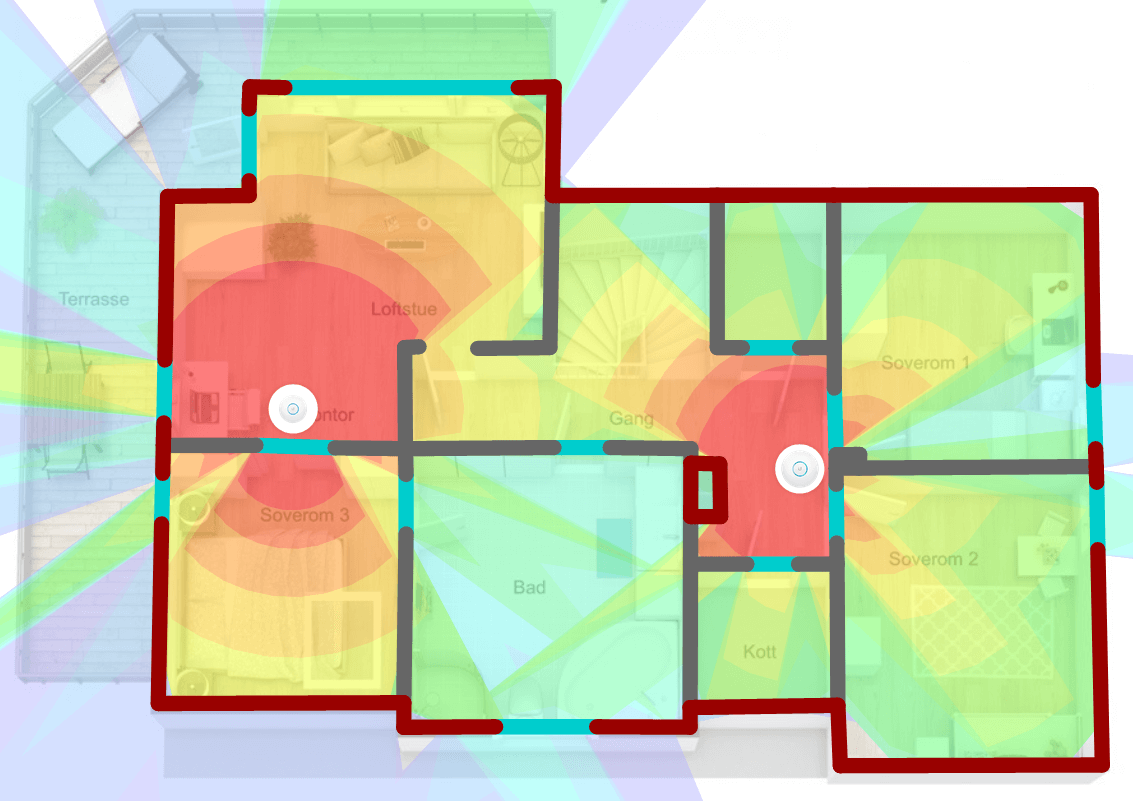
The U6-Lite access point is located right outside the bedroom door, in the den. Providing great signal to both the bedroom, the den, and probably the 2nd floor terrace outside 😎
I removed the UAP-AC-IW, and the CAT6 is just patched through to a switch on the TV bench. Once my new network run to the den is complete — this patch cable can be removed as well.
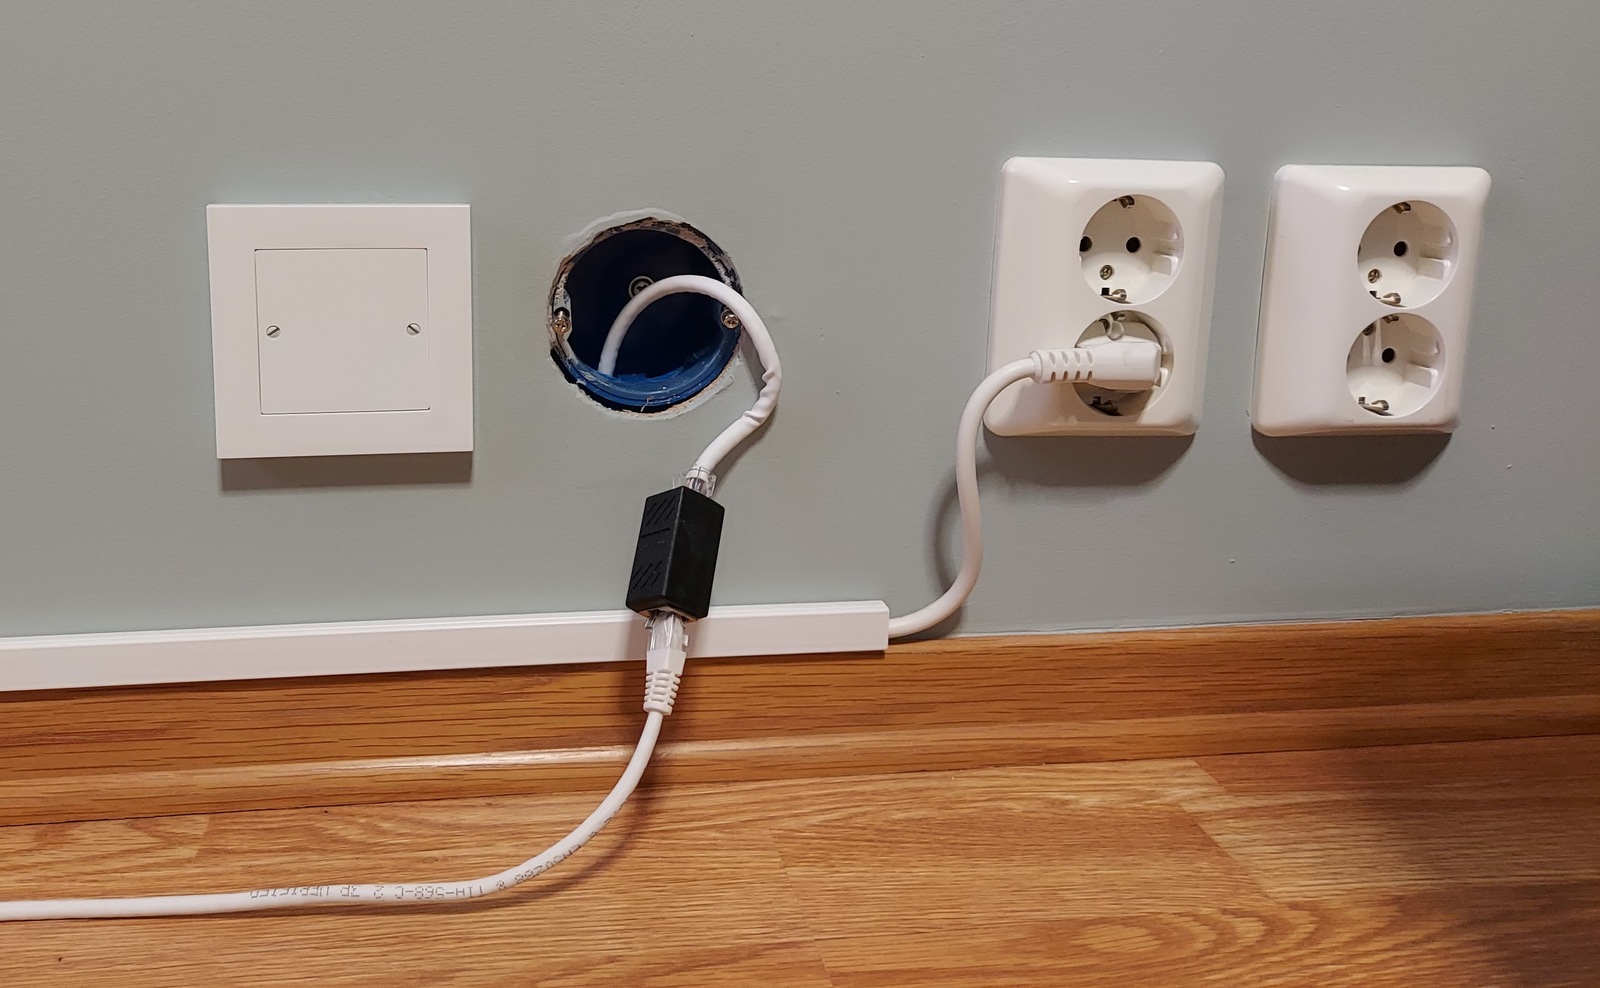
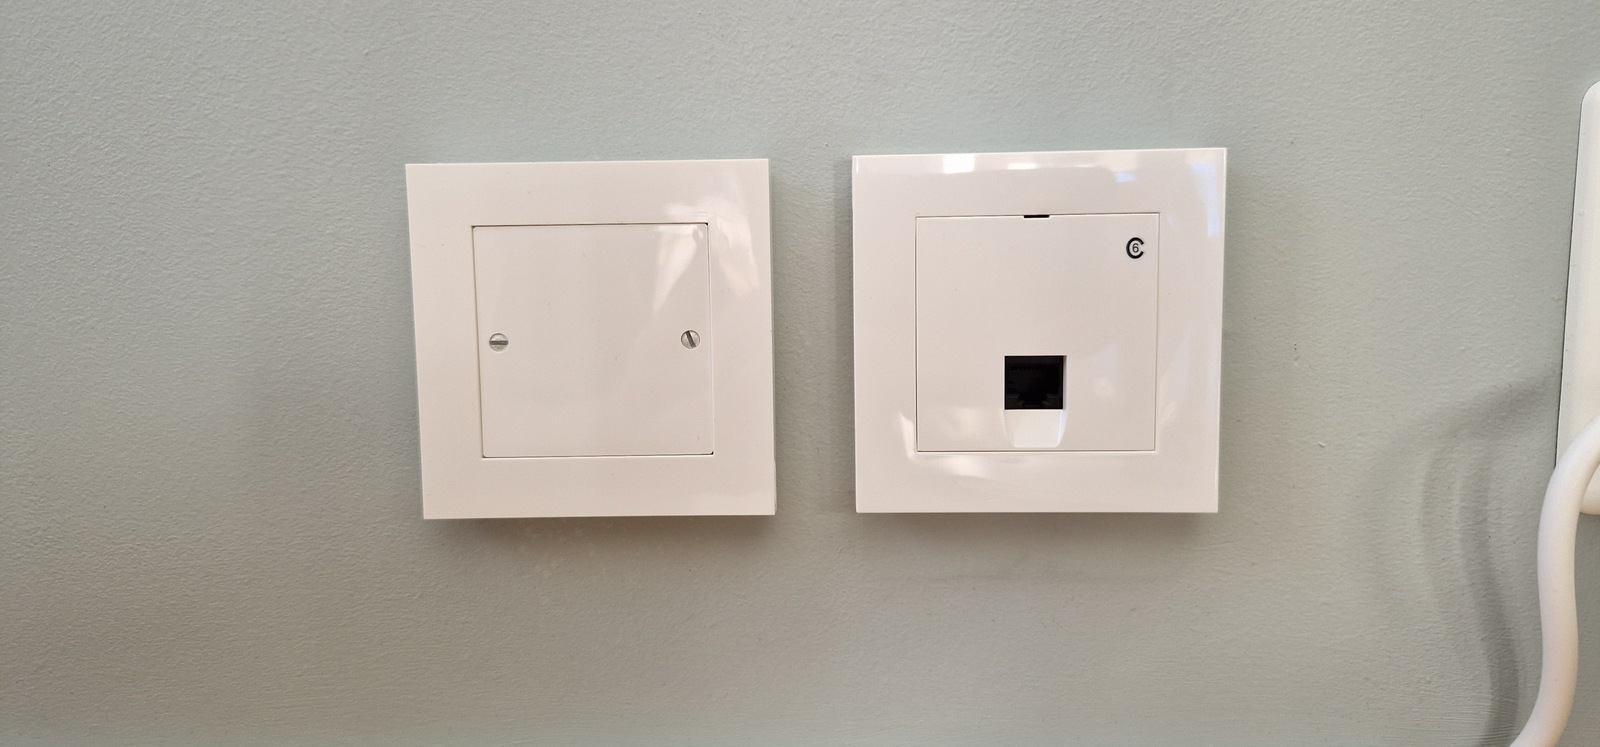
Not sure if I need this outlet anymore, but since the CAT6 is already there — I’ll just install a single network wall outlet.
Coverage map
The two new access points on the 2nd floor provide good/great 5 GHz coverage on the entire floor, at least according to the Unifi Design Center (which is highly theoretical).
Wrapping up
This was a big Wi-Fi improvement, most noticeable for Mona — she often uses her Chromebook to watch an episode of something in bed.
Wi-Fi improving, measuring, and planning is highly addictive! It’s easy to get caught up obsessing about getting perfect 5 GHz coverage everywhere — well, at least for me. But Wi-Fi signals are hard to predict, there are so many possible factors of damping, reflection, and interference.
It’s generally good advice to place access points where you need Wi-Fi, places you spend time — like your living room, gaming room, porch, etc. It’s quite common to place them in hallways, but this is not always a good idea. You don’t spend time in hallways, you walk through them. You may cover multiple rooms with an access point in the hallway, but with lower signal strength.
Time will tell if my access point in the hallway outside the kids’ rooms provide adequate signal strength — the kids don’t use Wi-Fi yet. But the UAP-AC-Pro I have wall-mounted in the 1st floor hallway is definitely misplaced 😕 My plan is to replace it with a ceiling mounted U6-Lite in the living room, once they get back in stock.
Last commit 2024-04-05, with message: Tag cleanup.
Home network v2 series
- Replacing Unifi switches with MikroTik
- Getting started with MikroTik CCR1009 and RouterOS
- Altibox fiber — straight into Mikrotik CCR1009
- Running underground CAT6 to detached garage
- Plans for my home network
- Running two CAT6 cables to the play room
- Running three CAT6 cables to the living room TV bench
- Moving CAT6 cable for access point; inside the wall
- Altibox fiber — straight into Ubiquiti EdgeRouter
- Two CAT6 cables and a fiber — from the basement to the attic
- A few Wi-Fi improvements
- Updated plans for my home network
- Knot Resolver — with ad blocking
- Pulling CAT6 cable in existing conduit
- Running CAT6 to the twins' rooms — inside interior wall
- Running CAT6 to the 2nd floor den — another interior wall
