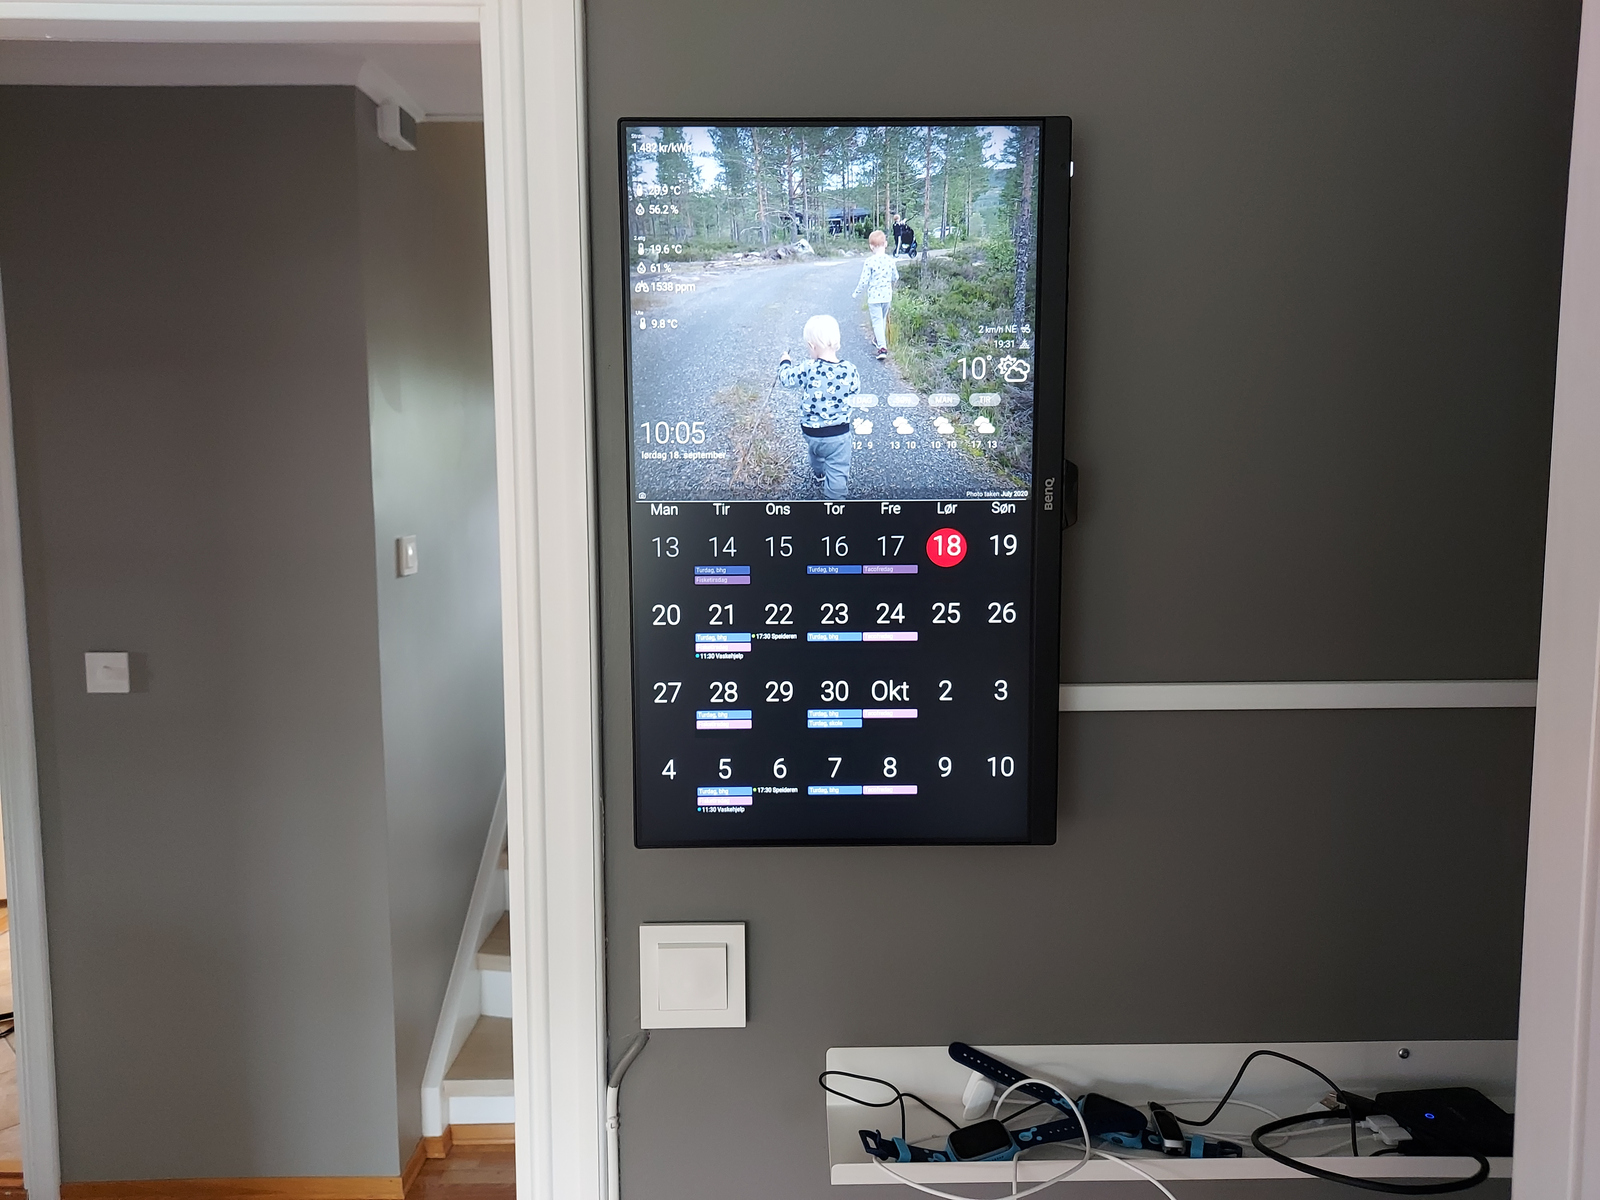
Earlier this year I put up a Raspberry Pi powered DAKboard display. It shows photos from our Google Photos albums, the time and weather, and most importantly; our shared calendar.
But I’d like it to show some custom data as well — like indoor temperature and humidity. And the measured outdoor temperature, not just the one reported from the weather service.
Here is how I did that — using Home Assistant 👇
Home Assistant
For DAKboard to access data from my Home Assistant; it needs access to the API. So first we need to create an API token for it. In Home Assistant, navigate to:
Profile -> Long-Lived Access Tokens -> Create
Make sure to write it down, it will only be shown once.
To show multiple sensor data within a single DAKboard block; it needs to be parts of the same API response. Some sensors, like the Netatmo, have different endpoint for its values.
But we can combine them using a template sensor:
template:
  - sensor:
    - name: netatmo_2etg
      state: "{{ states.sensor.netatmo_2_etg_temperature.state }}"
      attributes:
        temp: "{{ states.sensor.netatmo_2_etg_temperature.state }}"
        humid: "{{ states.sensor.netatmo_2_etg_humidity.state }}"
        co2: "{{ states.sensor.netatmo_2_etg_co2.state }}"
The API URL for the sensor above is:
http://IP-OR-HOST:8123/api/states/sensor.netatmo_2etg
If we make a GET call to that URL, as described in the documentation, we get the following response:
{
  "entity_id": "sensor.netatmo_2etg",
  "state": "19.6",
  "attributes": {
    "temp": 19.6,
    "humid": 61,
    "co2": 1496,
    "friendly_name": "netatmo_2etg"
  },
  "last_changed": "2021-09-18T07:58:03.657143+00:00",
  "last_updated": "2021-09-18T08:09:03.675011+00:00",
  "context": {
    "id": "xxxxxxxxxxxxxxxxxxxxxxxxxxxxxxxx",
    "parent_id": null,
    "user_id": null
  }
}
Nice, now onto DAKboard…
DAKBoard
On your custom screen, add a new block:
Add a Block -> External Data/JSON
- Set Authorization Type to
Bearer Token - Enter the API token we created earlier
- Click the play button (▶️) to refresh the data
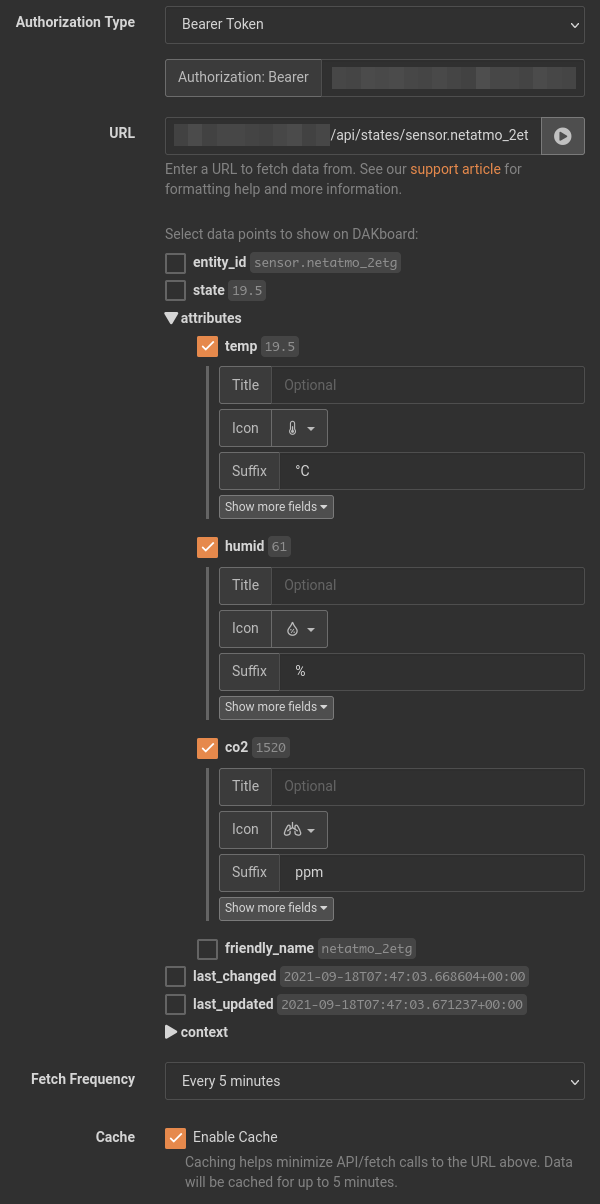
- The data points in the API response is now available for selection
- Select data points to show in your DAKboard block
My layout
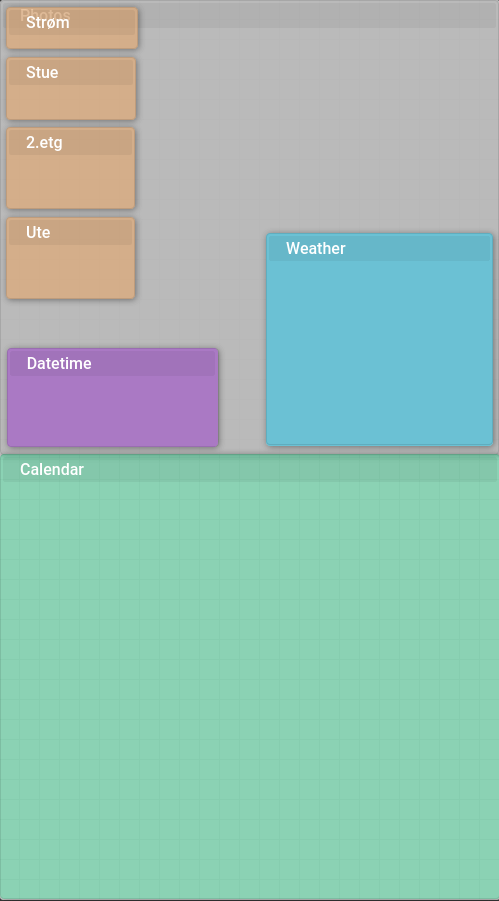
In my layout, I’m using the following external data blocks:
- Power price from Tibber
- Living room climate data from Sensibo
- 2nd floor climate data from Netatmo
- Outside temperature from Met.no
- To be replaced by a Raspberry Pi temperature sensor
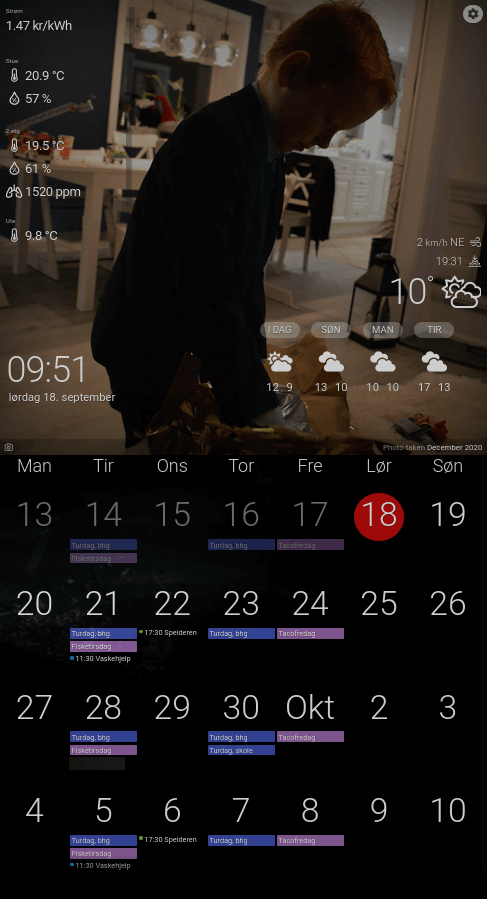
And here is our custom DAKboard screen:
Closing thoughts
Using Home Assistant as the data source for things like this is awesome. Home Assistant can pull data from so many sources, and customize it if necessary.
With DAKboard there is limited formatting and calculation options. But using Home Assistant’s sensor templates; you can do a lot of those things 🙂
The only challenge now is to refrain from completely cluttering the layout with custom data 😛
Last commit 2023-12-25, with message: replace emoji slight_smile/slightly_smiling_face
🔗 This post has been shared to: Reddit
