Comments. I’ve written about them before, two times — but here we go again.
Long story short; I’ve spent some time thinking about adding comments, and think it might be time to give it another try. Why now? As my traffic numbers have gone up, so has the emails from readers. I don’t get a lot — by any measure, but I do get some with very good insight about the post.
I’d like to share that knowledge, but reworking it into the article is not always so easy. With a comment section; they could be put on display 🙂
Update Feb 2: 15 days — that’s how long it took for me to remove my comments implementation. It worked just fine, I just decided that I didn’t need it after all.
Implementing it was fun, maintaining the additional VPS was not. It kind of goes against my goal with this website; keep it simple.
I’m thinking of other, and better ways, to display replies — like webmentions. I might dive into that at some point.
Table of contents
What commenting system?
I won’t spend a lot of time going though the different comment system options, as there are plenty of good posts about that already. Like these ones:
- Overview of the best commenting systems for your static website
- Comparing blog comment systems with privacy features
- The ultimate guide to comments for static sites
When I first wrote about comments in 2019 — I didn’t want to self-host. But I’ve changed my mind, now I do want to self-host. I’ve seen commenting systems shutdown, like JustComments that I decided to use in 2019, and pricing adjusted. By self-hosting I’m in control — of the content, cost, and web performance 😎
I looked at a few options:
- Staticman
- Too many moving parts
- Mouthful
- A bit too minimalistic
- Remark42
- Way more than I need
- Seems to require the use of at least one OAuth provider
- I initially had an
window.remark_config is undefinederror - Got 401 unauthorized errors when trying anonymous login 😕
- Isso
- Simple identification
- Easily integrated into site design
- Just enough functionality
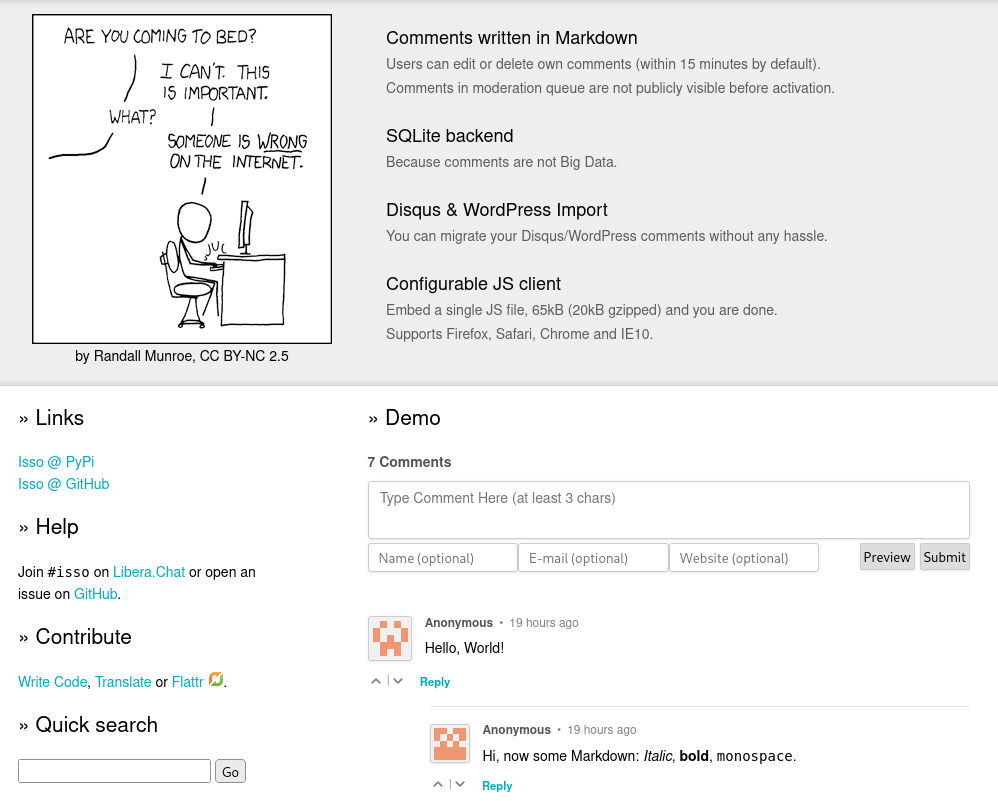
I’ve decided to go with Isso. It seems to be just what I need, and nothing more 🙂 I did briefly look at Isso back in 2019:
I didn’t like how it looked, it seemed a bit outdated, and it was not as lightweight as I would have liked.
Well — I’ve changed my mind, I like it now and it’s easy to change the CSS 🙂 And it seems like the project has some new maintainers and updates lately 👍
But enough about that, let’s implement it!
Implementation
VPS
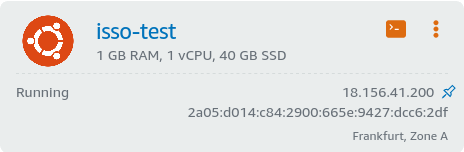
To host Isso — I created an AWS Lightsail VPS instance: $5 for 1 GB RAM, 1 vCPU, 40 GB SSD, and 10% sustainable CPU utilization. I know I could save a few bucks by hosting it elsewhere, but it’s cheap enough and does the job. It’s also convenient having everything within the AWS console.
The instance was set up with Ubuntu 20.04 LTS.
Isso
Next it was time to install and configure Isso itself. As Isso is a Python application — I used Pipenv to create a virtual environment:
$ sudo apt install pipenv

$ mkdir ~/isso
$ cd ~/isso
$ pipenv install isso
In the ~/isso folder; I created isso.conf:
[general]
dbpath = comments.db
host = https://blog.cavelab.dev/
max-age = 15m
reply-notifications = true
notify = smtp

[server]
public-endpoint = https://blog.cavelab.dev/isso
trusted-proxies = 127.0.0.1
samesite = Strict

[moderation]
enabled = true
approve-if-email-previously-approved = false
purge-after = 30d

[guard]
enabled = true
ratelimit = 2
direct-reply = 3
reply-to-self = false
require-author = false
require-email = false

[admin]
enabled = true
password = verysecret

[smtp]
username =
password =
host = localhost
port = 25
security = none
to = admin@mydomain.net
from = "Cavelab blog" <noreply@mydomain.net>
timeout = 10
Now to run Isso:
$ cd ~/isso
$ pipenv run isso -c isso.conf
A few updates
I installed Isso version 0.12.5 from pypi, but that version doesn’t include a few important fixes:
- Cookie SameSite/Secure handling
- Require edit cookie to view comment to be edited
- Using pre for comments in admin area
To get these updates, I pulled some files from the repository:
isso/views/comments.pyisso/css/admin.cssisso/templates/admin.html
And copied them into my virtual Python environment in ~/.virtualenvs/isso-xxxxxxxx/lib/python3.8/site-packages/isso/. Overwriting the files from the 0.12.5 release.
Supervisor
To run Isso in the background, start it at boot, and make sure it keeps running; I used Supervisor:
$ sudo apt install supervisor
And created a configuration at /etc/supervisor/conf.d/isso.conf:
[program:isso]
command=pipenv run isso -c isso.conf
directory=/home/ubuntu/isso
autostart=true
autorestart=unexpected
user=ubuntu
stderr_logfile=syslog
stdout_logfile=syslog
Now Isso starts at boot, and is restarted if it should exit unexpectedly 🙂
Nginx
Isso doesn’t handle TLS, and I didn’t want to expose it directly. So I installed Nginx as a reverse proxy:
$ sudo apt install nginx
I also needed a certificate for the TLS traffic, and for that I used Let’s Encrypt with the acme.sh client:
$ curl https://get.acme.sh | sh -s email=admin@mydomain.net
As I have my domain in Route53, I had to create an AWS user with programmatic access. All explained here: How to use Amazon Route53 API.
And then to issue the certificate:
$ export AWS_ACCESS_KEY_ID=xxxxxx
$ export AWS_SECRET_ACCESS_KEY=xxxxxx

$ cd ~/.acme.sh/
$ ./acme.sh --issue --dns dns_aws -d isso.mydomain.net

$ sudo mkdir -p /etc/ssl/services
$ cp isso.mydomain.net/fullchain.cer /etc/ssl/services/
$ cp isso.mydomain.net/isso.mydomain.net.key /etc/ssl/services/
I also needed dhparam.pem:
$ curl https://ssl-config.mozilla.org/ffdhe2048.txt | sudo tee /etc/nginx/dhparam.pem
Alright — time to configure Nginx, I first created snippet /etc/nginx/snippets/ssl.conf:
ssl_certificate /etc/ssl/private/fullchain.cer;
ssl_certificate_key /etc/ssl/private/isso.mydomain.net.key;
ssl_session_timeout 1d;
ssl_session_cache shared:MozSSL:10m;  # about 40000 sessions
ssl_session_tickets off;

# curl https://ssl-config.mozilla.org/ffdhe2048.txt > /path/to/dhparam
ssl_dhparam /etc/nginx/dhparam.pem;

# intermediate configuration
ssl_protocols TLSv1.2 TLSv1.3;
ssl_ciphers ECDHE-ECDSA-AES128-GCM-SHA256:ECDHE-RSA-AES128-GCM-SHA256:ECDHE-ECDSA-AES256-GCM-SHA384:ECDHE-RSA-AES256-GCM-SHA384:ECDHE-ECDSA-CHACHA20-POLY1305:ECDHE-RSA-CHACHA20-POLY1305:DHE-RSA-AES128-GCM-SHA256:DHE-RSA-AES256-GCM-SHA384;
ssl_prefer_server_ciphers off;

# HSTS (ngx_http_headers_module is required) (63072000 seconds)
add_header Strict-Transport-Security "max-age=63072000" always;
Then the configuration for the site:
server {
    listen       443 ssl;
    listen       [::]:443 ssl;
    server_name  isso.mydomain.net;

    include snippets/ssl.conf;

    if ($http_CloudFrontAuth != "secret") { return 403; }

    set_real_ip_from  0.0.0.0/0;
    real_ip_header    X-Forwarded-For;
    real_ip_recursive on;

    location / {
        proxy_set_header X-Forwarded-For $proxy_add_x_forwarded_for;
        proxy_set_header X-Script-Name /isso;
        proxy_set_header Host $host;
        proxy_set_header X-Forwarded-Proto $scheme;
        proxy_pass http://localhost:8080;
    }

}
Pretty basic, with a few custom things; I’m only using this as an origin for AWS CloudFront. But I don’t want to maintain a list of CloudFront IP addresses; so I simply trust everyone to send the correct replacement addresses.
But! The connection is only allowed if the request has a CloudFrontAuth header with the correct secret 🙂
Postfix
I want Isso to send emails — and for that I’m using Postfix and AWS SES. First we install Postfix, then configure it as described here: Integrating Amazon SES with Postfix:
$ sudo apt install postfix

$ sudo postconf -e "relayhost = [email-smtp.eu-west-1.amazonaws.com]:587" \
"smtp_sasl_auth_enable = yes" \
"smtp_sasl_security_options = noanonymous" \
"smtp_sasl_password_maps = hash:/etc/postfix/sasl_passwd" \
"smtp_use_tls = yes" \
"smtp_tls_security_level = encrypt" \
"smtp_tls_note_starttls_offer = yes" \
"smtp_tls_CAfile = /etc/ssl/certs/ca-certificates.crt"
Next a file with the credentials for SES; /etc/postfix/sasl_passwd
[email-smtp.eu-west-1.amazonaws.com]:587 SMTPUSERNAME:SMTPPASSWORD
And create a hash map database file:
$ sudo postmap /etc/postfix/sasl_passwd
I also made a SMTP generic map, to ensure that I was only sending emails from the domain I verified in SES:
$ sudo postconf -e "smtp_generic_maps = hash:/etc/postfix/generic_maps"
Create the file /etc/postfix/generic_maps, remember to create a hash map with postmap as above:
@my-vps-fully-qualifies-domain-name noreply@mydomain.net
Restart Postfix:
$ sudo systemctl restart postfix
And send a test mail to mysql:
$ sudo apt install mailutils

$ echo test message | mail -s "test subject" admin@mydomain.net
CloudFront
First I created a new origin for the Isso VPS, pointing at my Isso domain.
Remember to add the custom header for authenticating with Nginx:

Next I added three new behaviors, above the default:

The first one, for /isso/js/embed.min.js is pretty standard:
- Allowed HTTP methods: GET, HEAD
- Cache policy: CachingOptimized
The second, for /isso/admin has caching disabled, and uses an origin request policy:
- Allowed HTTP methods: GET, HEAD
- Cache policy: CachingDisabled
- Origin request policy: AllViewer
The third, for /isso/* has a custom cache policy, and an origin request policy:
- Allowed HTTP methods: GET, HEAD, OPTIONS, PUT, POST, PATCH, DELETE
- Cache policy: CommentCaching (custom)
- Default TTL (seconds): 5
- Cache key settings: Query strings - All
- Origin request policy: AllViewer
This caches the comment API responses from Isso, with query strings, for 5 seconds (since Isso doesn’t set a Cache-Control or Expire header on API responses — it uses the Default TTL). This means that comments may be up to five seconds “out of sync”, but its an effective measure to protect Isso from getting flooded with requests, even if a post becomes popular on Reddit or Hacker News.
I initially had the Default TTL set to 30 seconds, but that was confusing when editing comments, as the preview was also cached for 30 seconds.
So if you edited your comment more than once within that period; it looked like the edits didn’t get saved.
Hugo
Now to implement it in Hugo, I added this to layouts/_default/single.html:
{{- if eq .Type $.Site.Params.contentTypeName -}}
  <div id="comments">
    <section id="isso-thread"
             data-title="{{ .Title }}"
             data-isso-id="{{ .Params.isso_path | default .RelPermalink }}">
    </section>
  </div>
{{- end -}}
It defines the title of the post, and relative permalink as data properties. I made it possible to override the permalink, with front matter property isso_path. This way I can keep the comments, even if the post URL changes.
The comment block is only inserted for pages of type posts, as defined in my config.toml:
[params]
  contentTypeName = "posts"
Next, in layouts/partials/footer.html:
{{- if and (not .Site.IsServer) (eq .Type $.Site.Params.contentTypeName) -}}
  {{- $issoCSS := resources.Get "css/isso.css" -}}
  <link rel="stylesheet" href="{{ ($issoCSS | minify | fingerprint).Permalink }}" />
  <script async
          src="{{ "/isso/js/embed.min.js" | absURL }}"
          data-isso="{{ "/isso/" | absURL }}"
          data-isso-css="false"
          data-isso-reply-notifications="true">
  </script>
{{- end -}}
This adds the Isso style sheet and script to the footer; but only if Hugo isn’t running as a local server, and the page type is posts. The script and Isso API is expected to be under /isso/ on the same domain as the site.
To better integrate Isso into my design; I set data-isso-css="false", copied the isso.css file from the repository to assets/css/, and adapted it to fit my theme 🙂
Conclusion
I found the experience of implementing Isso quite enjoyable. Being able to intertwine it into the same domain as the website was nice 🙂 And playing with the CSS made it fit nicely into the site design.
For me — Isso has just the right amount of features, and is pretty minimalistic. I don’t need OAuth login, fancy forms, deeply nested comments, or Gravatar icons. I just want a simple, privacy friendly, and light solution that enables readers to leave a comment. And Isso is just that 🙂
Whether anyone will actually write any comments remains to be seen… You can try it out below 👇 — all comments are held for moderation.
Last commit 2024-04-05, with message: More tag clean up.
